

In the previous post, I introduced part of the Stamp block. As I have said, this is a very long code segment and its functionality could be divided into three parts. In the previous Part 2 analysis, I analysed the first functionality – drawing the blocks on the stage. In this post, I will continue introducing its second and third funtionality: respond to mouse action or keyboard events and add/edit/remove the blocks.
In the following code segments (follow the previous post – Part 2), you will see a line which “set size to 100000000%”. This setting seems not having much meaning. It is acting like a delimiter to indicate that the program enters the second functionality.
The program then switches costume to “begin”, goes to the starting position and stamps the “begin” costume. After that, “joystick” block will check if mouse presses on joystick costume. “joystick” block is used to scroll the map. I will introduce this “joystick” block at the end of the post. If the mouse is pressing on the joystick, the program will stop running the following code of “stamp” block, because it assumes the user is scrolling the map, instead of adding or editing the blocks.

After “joystick” block, you will see another block “set size to 100000000%”. Like the previous one, this code block is also acting like a delimiter, indicating that the following part of the code is going to handle a different functionality – add, edit or remove blocks.
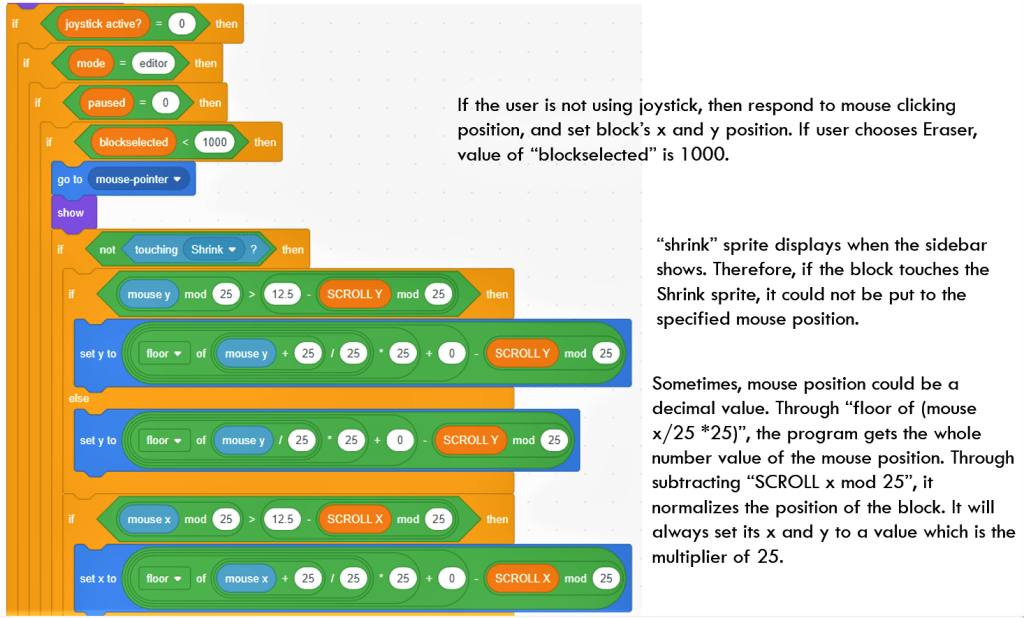
First, the program checks if “joystick active?” variable is equal to 0, “joystick active?” variable is 1 when mouse is pressed down on “joystick” costume. If “joystick active?” variable is 0, it indicates that user is not scrolling the map. It further checks “mode” variable and “paused” variable. When “mode” variable is equal to “editor” and “paused” is equal to 0, the program is going to edit those blocks.
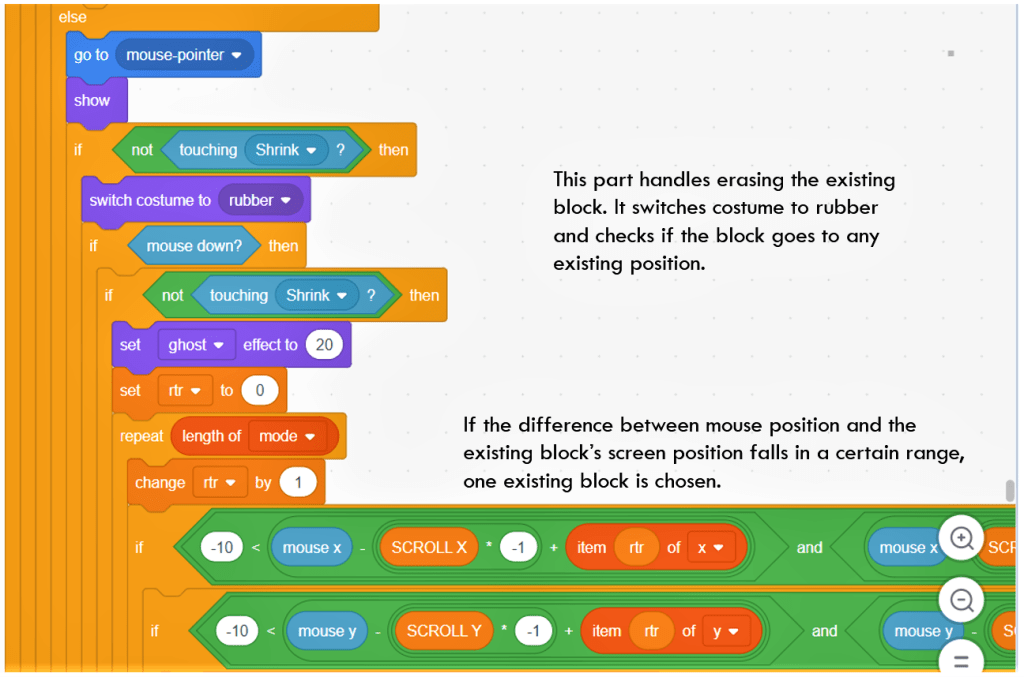
“Shrink” refers to the area at the bottom and right part of the stage, where block types and menu show. Therefore, only when “not touching Shrink”, Block sprite could conduct adding or editing functionality.
The following step is to recognize block position based on the mouse position. Please note that all the blocks are arranged in a tile like structure spreading out the whole map. Each block has a size of 25 units by 25 units. So how to know the block position based on the current mouse position? It uses a formula to convert mouse position into Block’s stage position.
It will compare “mouse y mode 25” with “SCROLL Y mode 25” to decide whether to put block in upper place or lower place. It all depends on the result of whether “mouse y mod 25 > 12.5 – SCROLL Y mode 25”. Sometimes, mouse position could be a decimal value. Through “floor of (mouse x / 25 * 25)”, the program gets the whole number of the mouse position. Through subtracting “SCROLL X mod 25”, it finds the stage position of the block and knows where to put it.
The illustration of how to set x and y of Block sprite is shown in the below diagram.
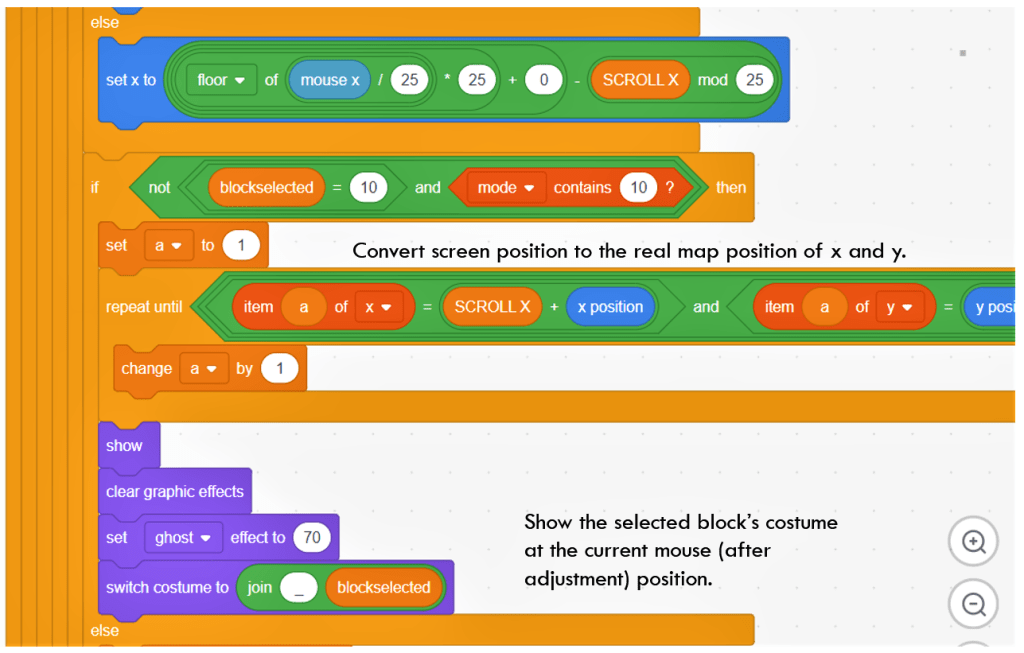
Please note the above calculated x and y positions refer to the stage position of a Block costume. Later on, we need to convert the x and y stage position into map position and store them in x, y, “mode” lists.
After getting x and y position of the current block, the program checks “if not ((blockselected = 10) and (mode contains 10))”. This line of code is used to judge if success flag has been added into the block lists. Since the whole game allows only one success flag, if “mode” list has contained the value of 10 and “blockselected = 10”, the program will automatically set “blockselected” value to 1, the ground block type. In this way, there will not have two or more success flags in the game.
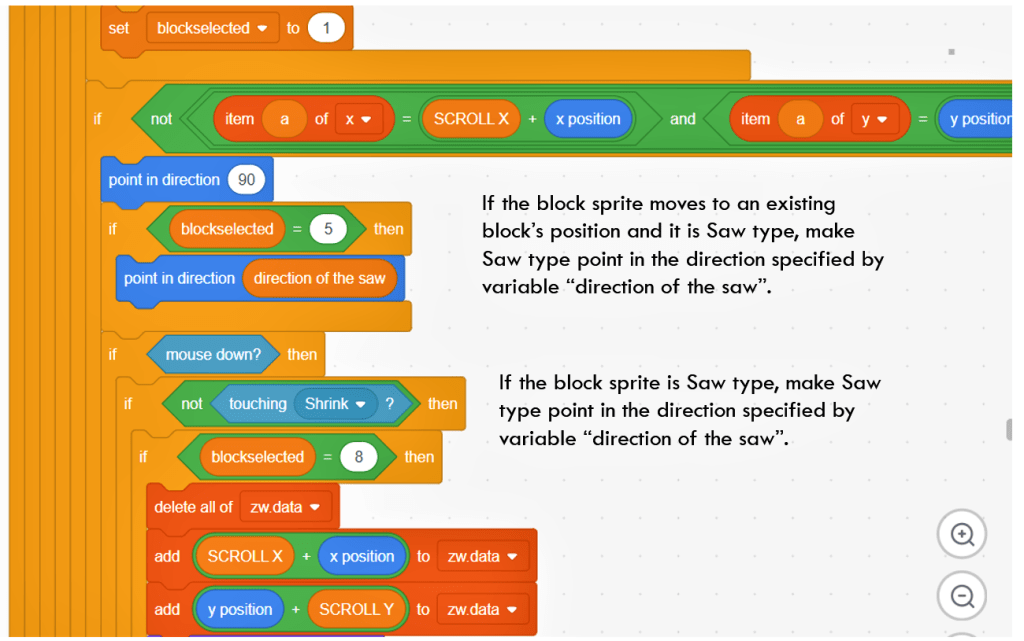
The program will then check if this block has been existing in the “x” and “y” lists. It judges this by comparing the block’s map position (SCROLL X + x position) with “item(a) of x”, map position (SCROLL Y + y position) with “item(a) of y”. That generates two possible results. If the current position does not exist in “x” and “y” lists, it is a new block. The program will call “add platform” block to add it. However, different block types might have different features. For example, if “blockselected” is 5, it is a Saw type. The porgram will update the direction of Saw costume with the value of “direction of the saw”.
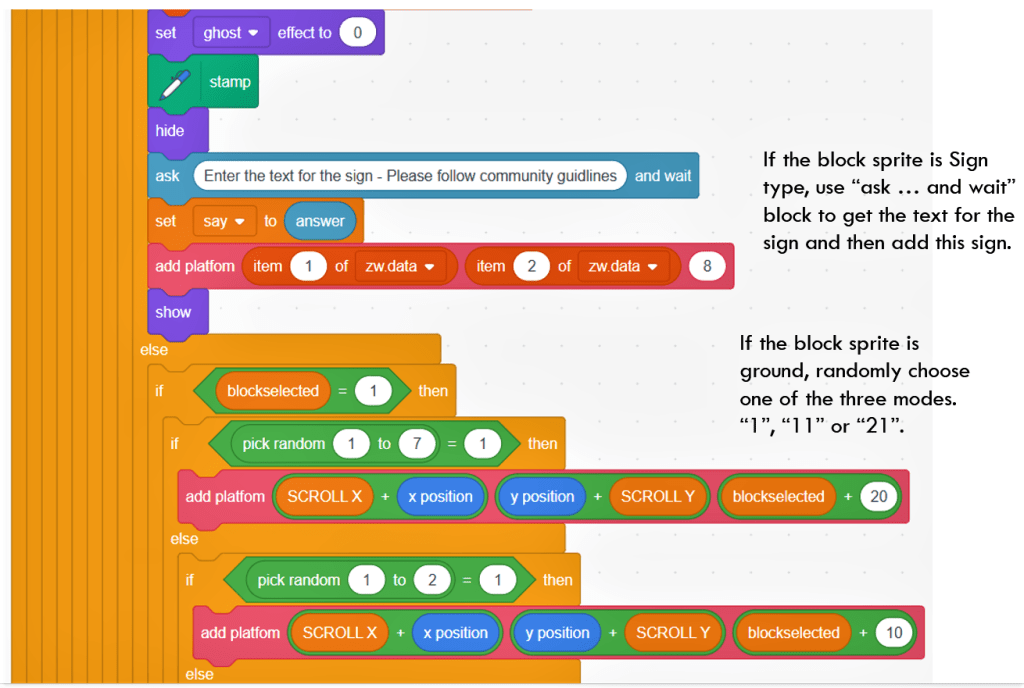
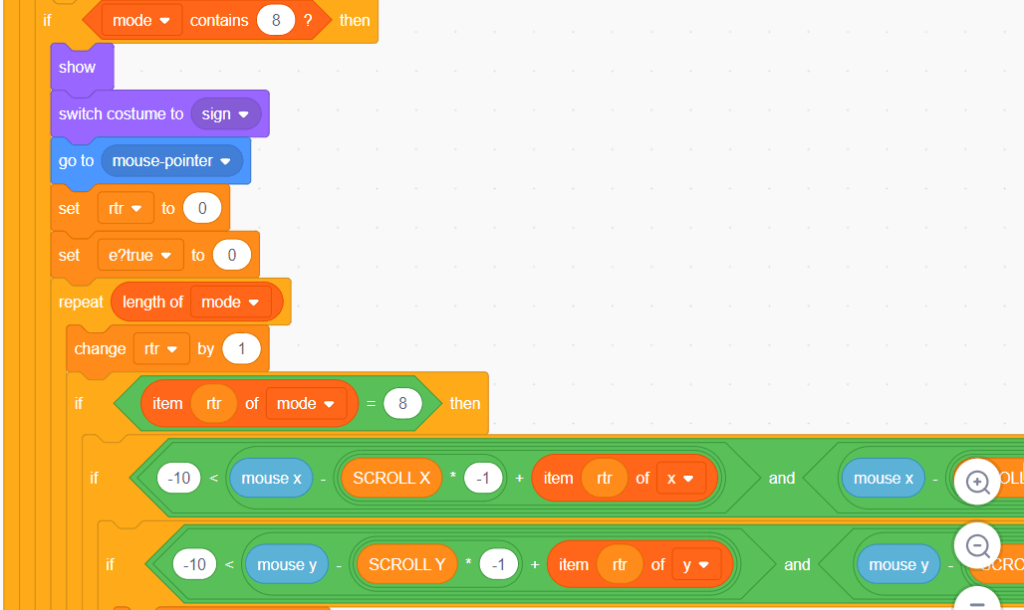
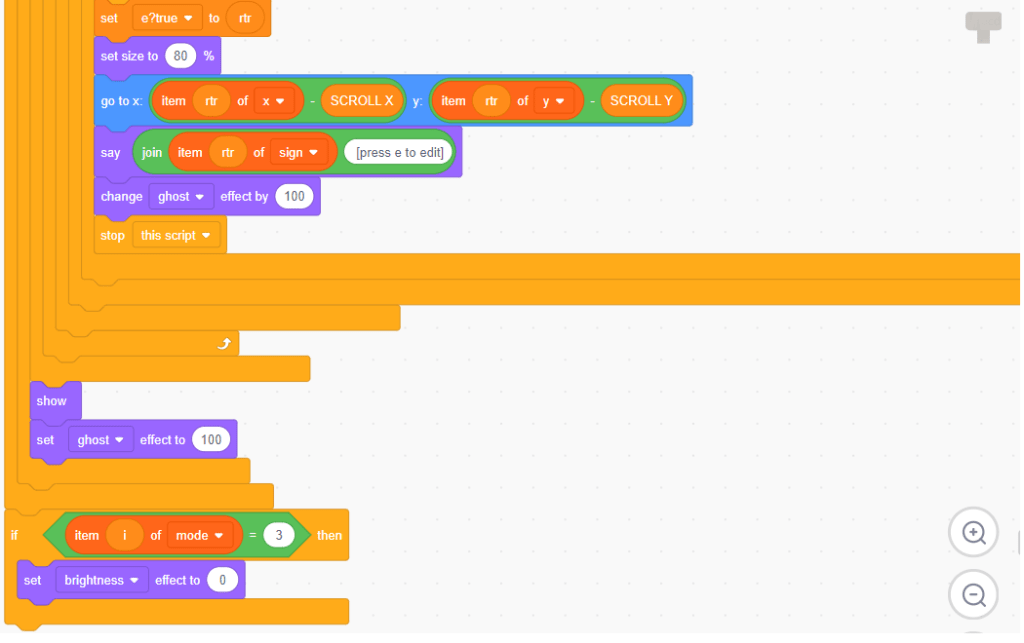
If “blockselected” is 8, it is a Sign type. It will store the block’s map position to a list “zw.data” temporarily and then ask user what to be shown as the message.
If “blockselected” is 1, it is a ground block type. It will randomly add platform with mode value of “01”, “11” or “21′.
For other block types, there are no special requirement and it will just call “add platform” block straightly.

The above code handles “add platform” functionality. However, if blocktype is 1000, it means the current block type is Eraser. It first checks if Eraser block does not touch Shrink sprite. It will then iterate all the existing blocks to check if the current position has any blocks occupied. This checking is done by comparing the value of “mouse x” and “SCROLL X * -1 + (item rtf of x)”, and comparing the value of “mouse y” and “SCROLL Y * (-1) + (item rtf of y)”. If the difference is within a range, it means the current position has block already, and the program calls “remove platform” block to remove it from all the relevant lists.
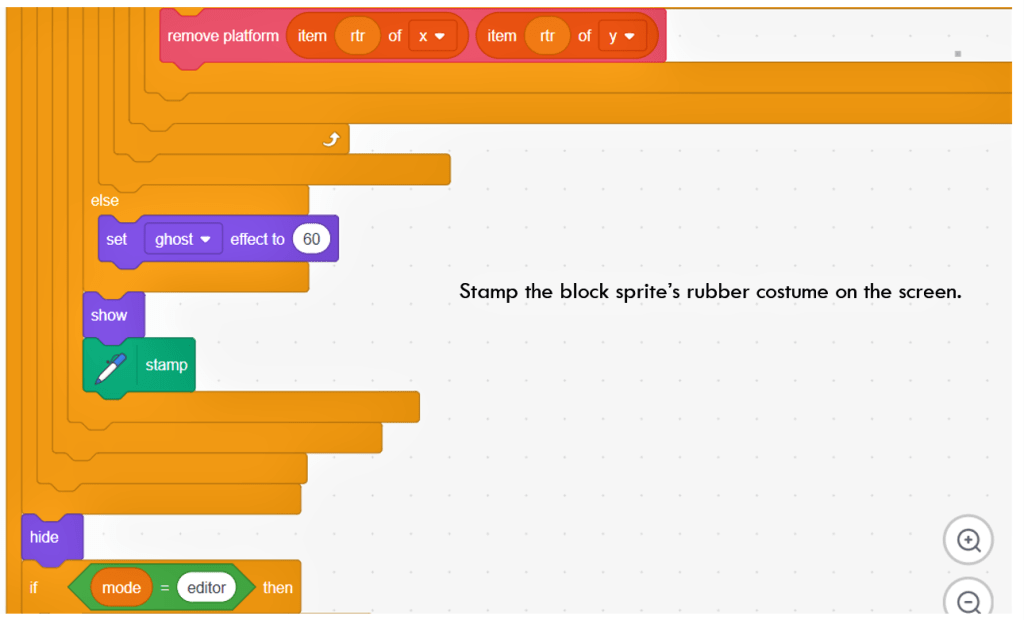
The last part of “Stamp” block handles the block type of 8. It is a Sign type. Whenver the mouse moves to an existing sign block, Block sprite will say “[press e to release]”. You might wonder why “stamp” block has no code to respond to user’s pressing of “e”. Don’t worry, that part of code is put in Hitbox sprite. We will analyse “Hitbox” sprite in the following posts.
“Joystick” Block
In the above code, the “Stamp” block calls “joystick” block to simulate the operation of joystick. So how to implement this functionality?
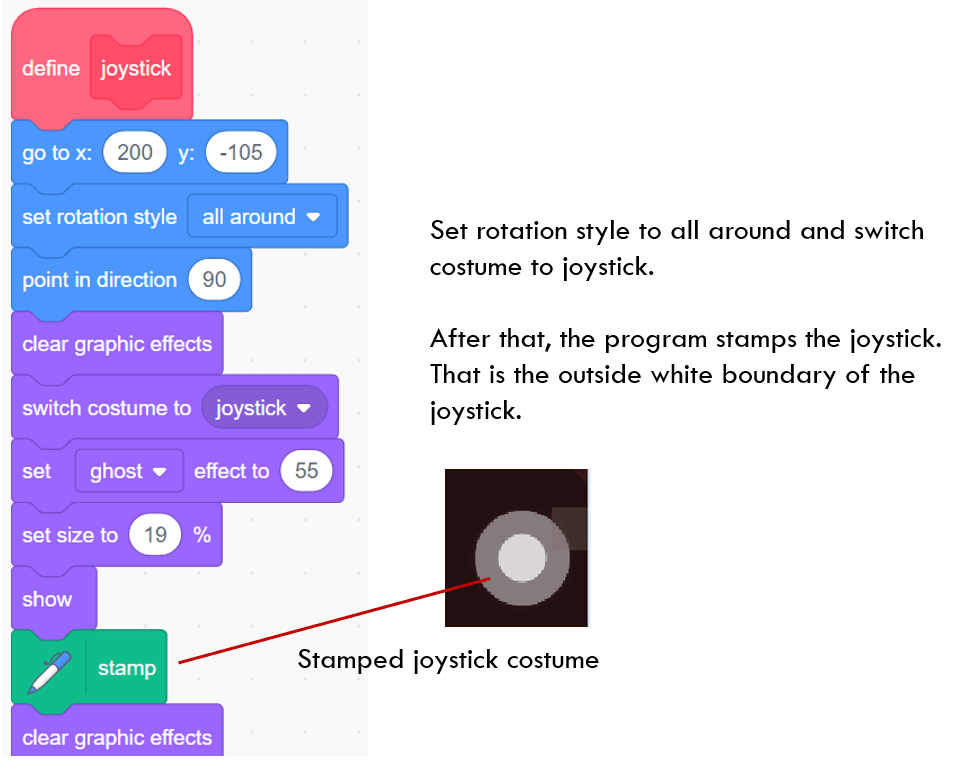
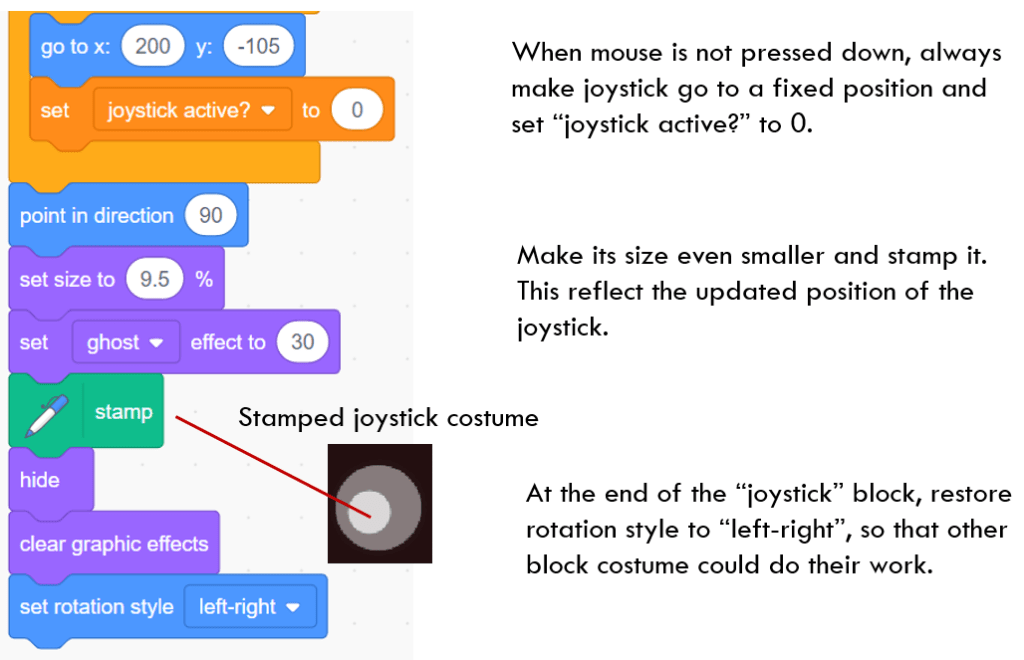
The “joystick” costume is a white round shape, which could respond to mouse pressing event. It is used to scroll the map. At the beginning of the block, the program sets its size to 19% and then stamps to a bottom-right position on the stage.
After that, the program checks if mouse is pressed down. If the distance of the Block sprite to mouse pointer is bigger than 20 units, block sprite moves 20 steps toward mouse pointer, otherwise, it moves to the position of mouse pointer directly.
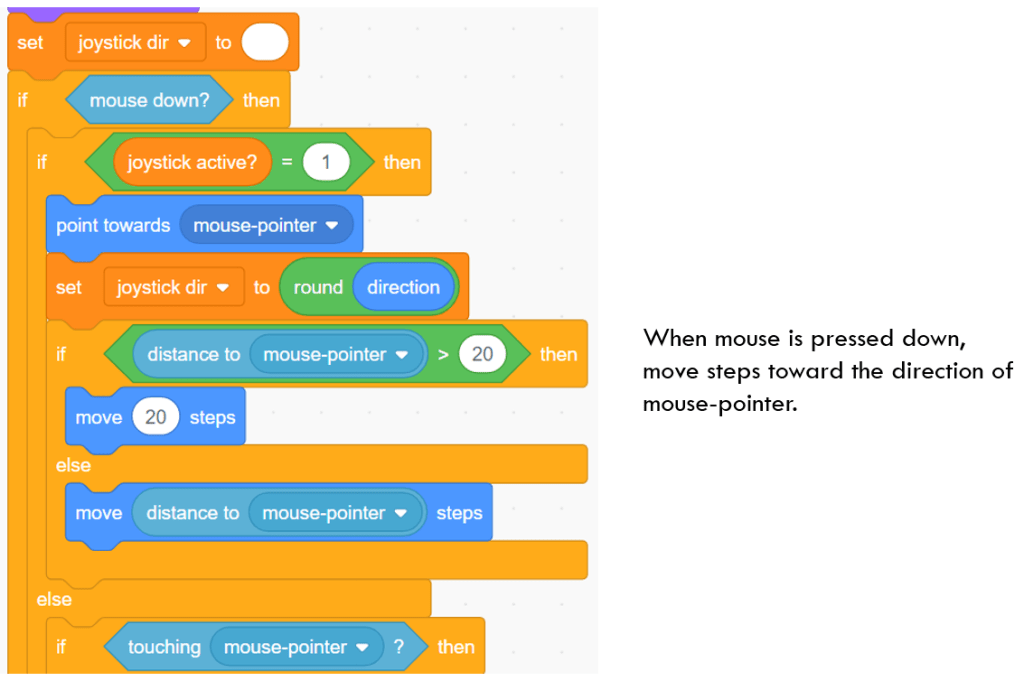

Such a behavior will make joystick costume respond to mouse pressing and make user feel they are operating on a real joystick. However, how to use “joystick” block to control the scrolling of the stage and map? This part is done in “Hitbox” sprite. We will introduce it later in the following posts.
That is all the code for “Stamp” block, a huge block consisting of more than 600 lines of code. Keen on knowing how Block sprite works together with Hitbox sprite? Keep tuning and we will see you on the following posts. Enjoy the coding and have fun!
Note: All the analysis articles are copyright products of http://www.thecodingfun.com. Anyone re-posting them should credit author and original source. Anyone using them for commercial purposes or translating them into other languages should notify TheCodingFun and get confirmation first. All Rights Reserved.

Pingback: Learn Scratch by Analyzing Others’ Project – Platformer Game with Editing Functionality Part 4 – The Coding Fun
Do you offer micropython? Jerry Seppelt
LikeLike