
In the building plans of LEGO Spike Prime software, we could find the building specification of a security box. When Left button is pressed, the box could be unlocked. However, if we want to design a more high-tech security box, simple lock/unlock functionality is not enough.
On YouTube, we could find videos on how to upgrade the security box. One way is to allow it set password, just like what we did in real life. That is a great idea. If you like to know what videos I watched, you could refer to this address: https://www.youtube.com/watch?v=7XJV-i-fW5Y&t=394s
Inspired by the above YoutTube video, I would design my own password-protected security box and explain the code in this post. The final effect is shown in the below video.
Upgrade Mechanical Structure
The upgrading work is based on the initial version. You could find step-by-step specification from LEGO Spike Prime software at Home Page -> Unit Plans -> Kickstart a Business – > Keep it Really Safe.
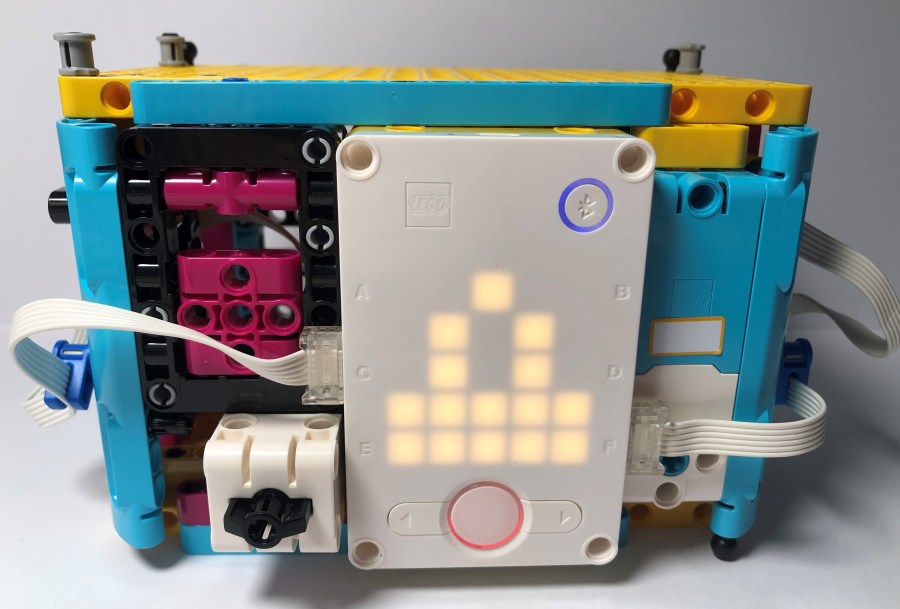
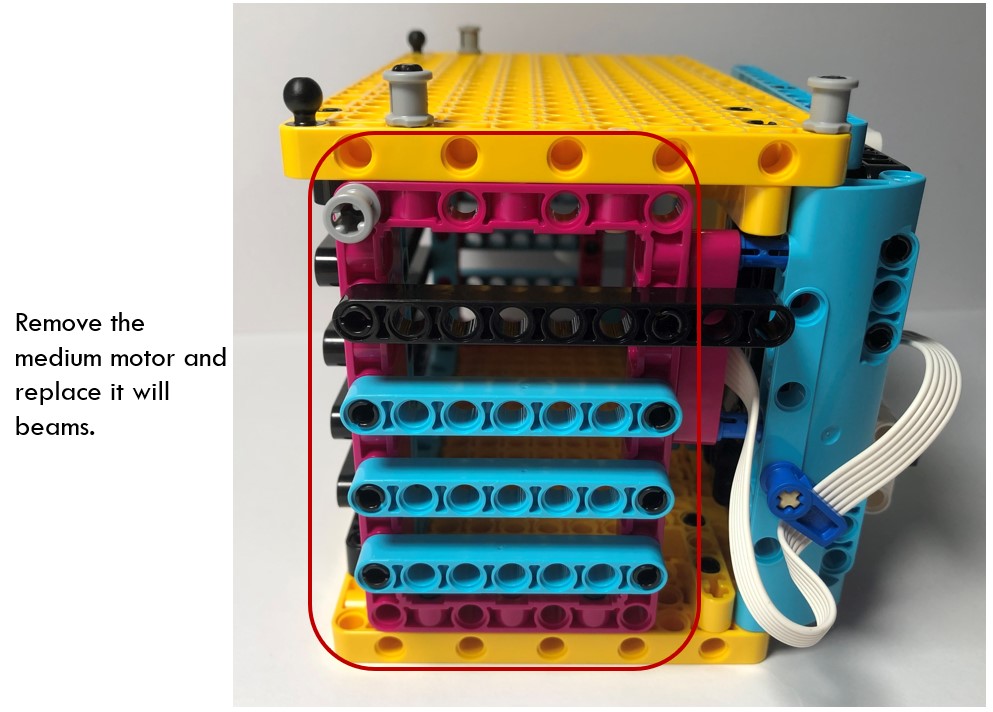
If you build the initial version of security box, you might find that some motors are not necessary. A medium motor attached on the right side is used to drive a pole, but that pole is a bit decorative. The big motor on the front side is connected to a gear, but the gear is not used to control locking mechanism.
The only motor used to control locking is the medium motor on the front face. There is a short beam attached to it. When the beam turns to a certain degree, it is stuck into a gap on the side face, locking the security box. When the beam turns back to the initial position, the box is unlocked.
The upgrading work includes removing the unnecessary medium motor and big motor. They are replaced with a force sensor, a few beams and 5*7 frames, so that I could use force sensor as an extra button to interact with player. Those beams and frames are just used to fill the empty place on the surface of the box.
You might wonder why I do not use the Center button on the smart hub. For LEGO EV3, all the 5 buttons on the smart brick could work as buttons. However, on LEGO Spike Prime, the Center button is only responsible for starting and stopping program. If you would like to simulate more button behaviors, using force sensor is an option.
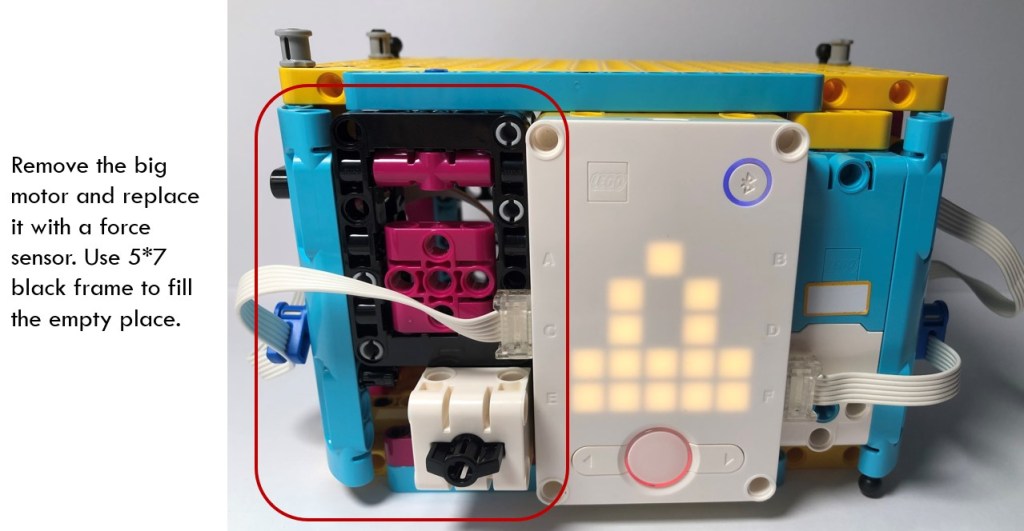
The inner surface of the gate is shown below. Please just ensure the replaced components having the same width as the original one, so that the whole model is not affected by the upgrading.

For the medium motor on the side face, it is just removed and then replaced with a black beam.
That is all for the change of mechanical structure. Not a huge task, right? Now we could start coding to make security box work. Let’s begin now.
Sample Code
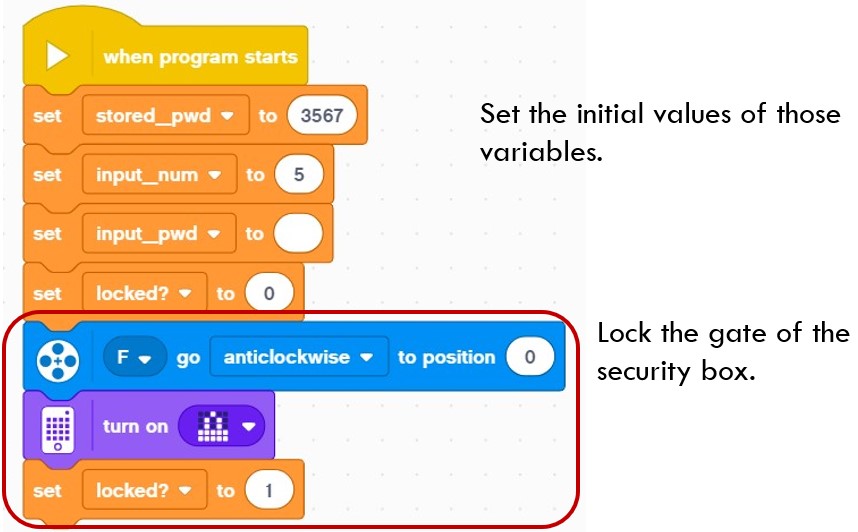
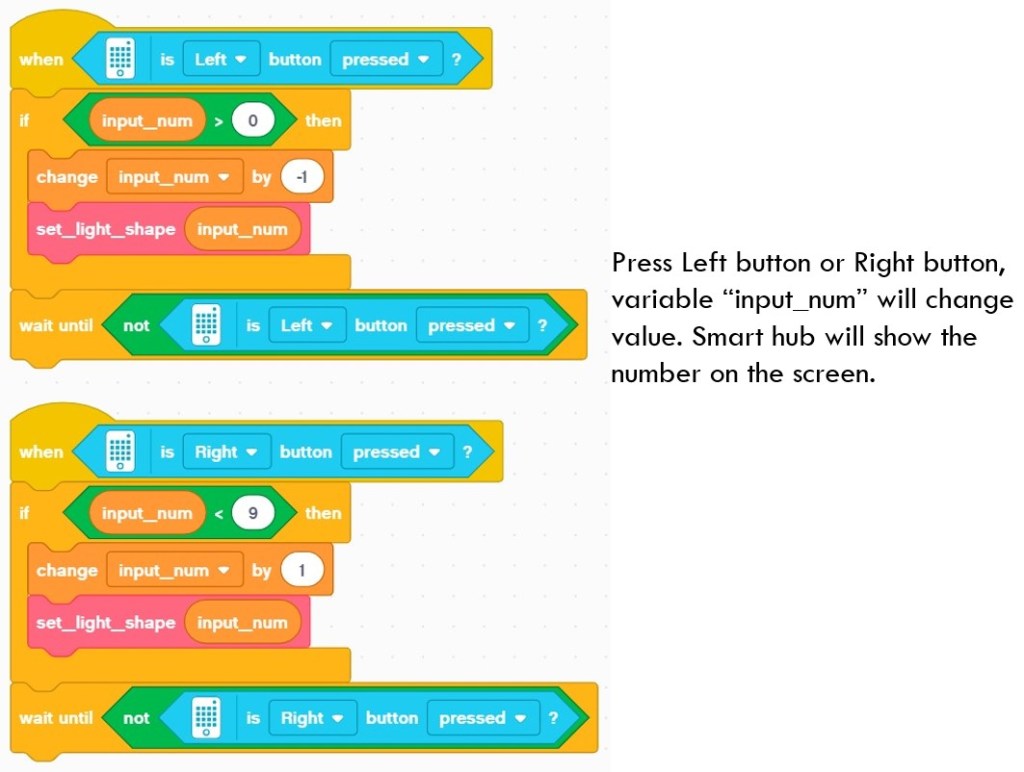
“when program starts” block sets the initial value for all the relevant variables. “stored_pwd” variable is used to store the pre-set password. You could customize this value to what you want. “input_num” variable represents the current chosen number, which also shows on the smart hub screen. “input_pwd” variable represents the input password, which is the accumulation of all the input number.
“locked?” variable is of a Boolean value. It represents the status of the box, locked or unlocked. If the box is locked, this variable has a value of 1, otherwise, its value is 0.
“when is Left/Right button pressed” Blocks
The two blocks will catch the Left/Right button pressing action and change the value of variable “input_num” accordingly. After input_num value changes, the program calls “set_light_shape” block to update the light shape on the smart hub light matrix. Please note the use of programming block “wait until”. The existence of this block ensures that the code runs once and only once each time the button is pressed.
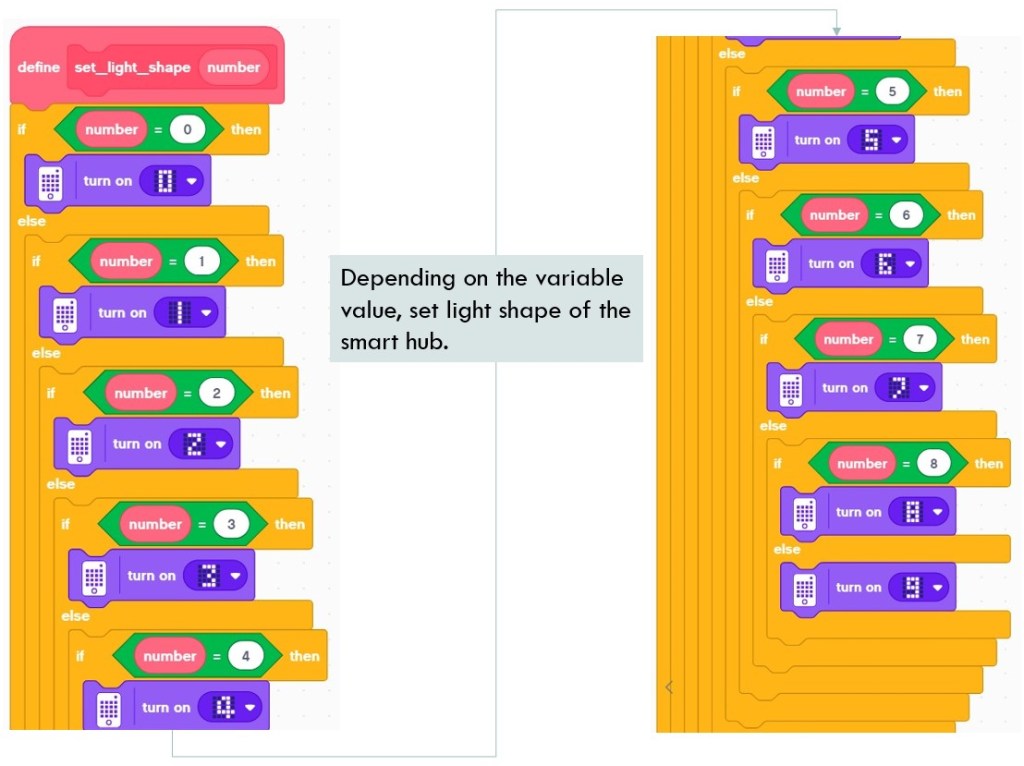
“set_light_shape” Block
This block is very long, but its structure is pretty simple. Based on the input parameter value, it sets light shape on smart hub light matrix.
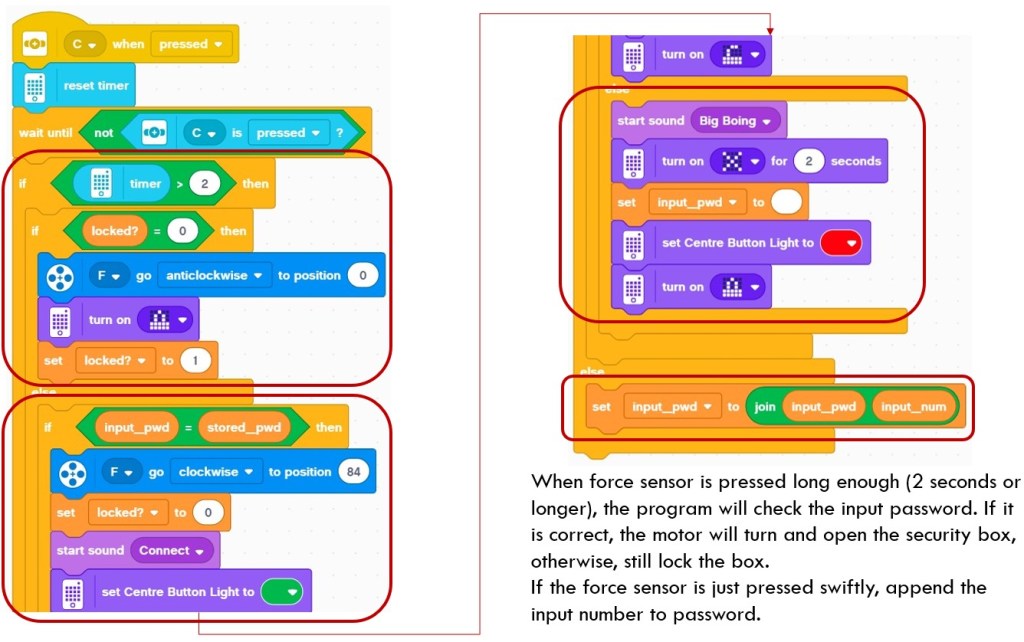
“(force sensor) when pressed” Block
This block wraps most of the key functionality of the project. At the beginning of the code segment, the program resets timer to 0, so it could get timer value after force sensor is released. Depending on the value of timer and locked? variable, the program responds differently.
When timer > 2, it represents a long pressing. If the security box is unlocked (locked? is equal to 0), the program will drive the motor to lock the box, as shown in the 1st red rectangle.
When timer > 2, but the security box is locked (locked? is equal to 1), the program will compare “input_pwd” with “stored_pwd”. If the values of the two variables are totally the same, it means the password is correct. The program will drive the motor to unlock the box. This behavior is shown in the 2nd scenario. However, if the “input_pwd” and “stored_pwd” are not equal, it means that user inputs wrong password. The box will keep locked and show “x” sign on the light matrix. Meanwhile, the program clears the input password, so that user could re-enter the password later. This is scenario 3.
The last scenario is simple. When timer < 2, representing a short pressing of the force sensor, the input number will be recorded and appended to the existing “input_pwd”.
That is all the code for the upgraded security box. You could think about other functions, such as setting new password by the user, adding voice notification, or locking longer time if user inputs wrong password several times. Practice makes perfect.
Finally, if you prefer to have a shortcut, here is the code for your reference.
Note: All the analysis articles are copyright products of http://www.thecodingfun.com. Anyone re-posting them should credit author and original source. Anyone using them for commercial purposes or translating them into other languages should notify TheCodingFun and get confirmation first. All Rights Reserved.

Pingback: Play LEGO Spike Prime – Upgrade Demo Project Security Box – Python Code – The Coding Fun