
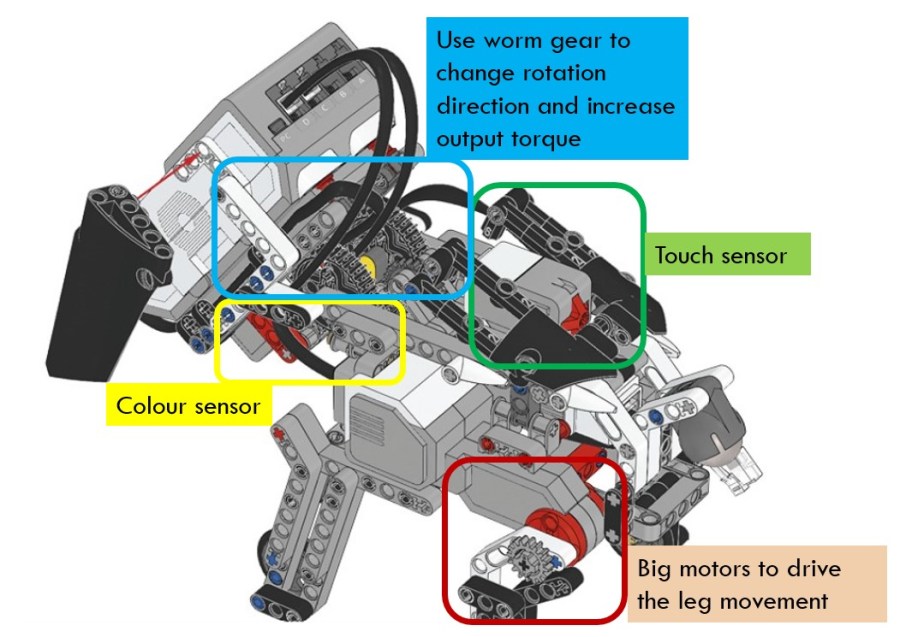
In the previous post, I analyzed the existing code of the demo project Puppy. The initial code is not easy to read, and has not used any parallel mechanism to run the code. When the program is running, the performance of the robot is not stable, that means, it could not respond to player well. In this post, I will rewrite the program and enhance the functionality of the pet puppy. At this moment, I will only change the program, and keep all the mechanical structure as it is.
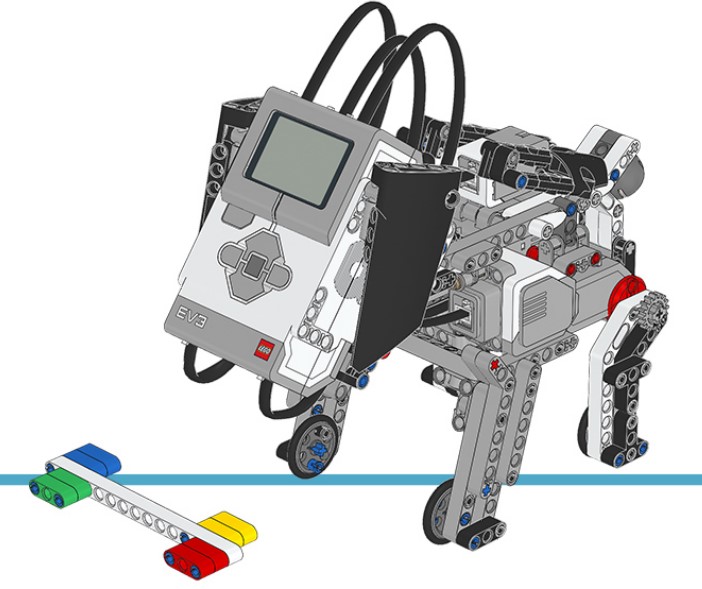
Let’s first look at the final effect of the puppy.
Initialization
The initialization part is similar to the old version. It sets a sitting gesture as the initial status. If Up or Down brick button is pressed, the program will adjust the angle of head. When Center brick button is pressed, the program will make the puppy stand up and bark. It will then sets Timer 3 to zero and sets variable waking_up to True. Done for the initialization!

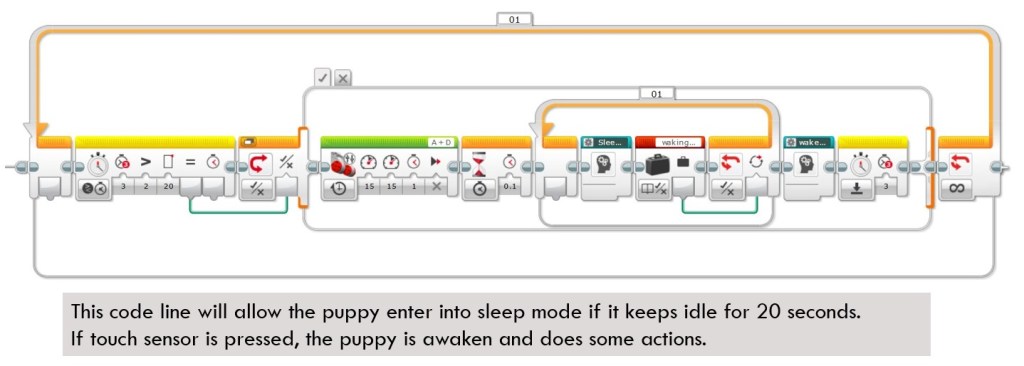
Sleeping and Waking Up
After initialization stage, one code line will enter into a loop in which the program will wait till Timer 3 exceeds 20 seconds, then it will make puppy sit down and call “Sleep_mode” block to make the dog snoring.
The “Sleep_mode” block is designed to check touch sensor status continuously. If the touch sensor is pressed, it will set “Waking_up” variable to True, so that the sleeping loop is interrupted and the puppy will wake up.
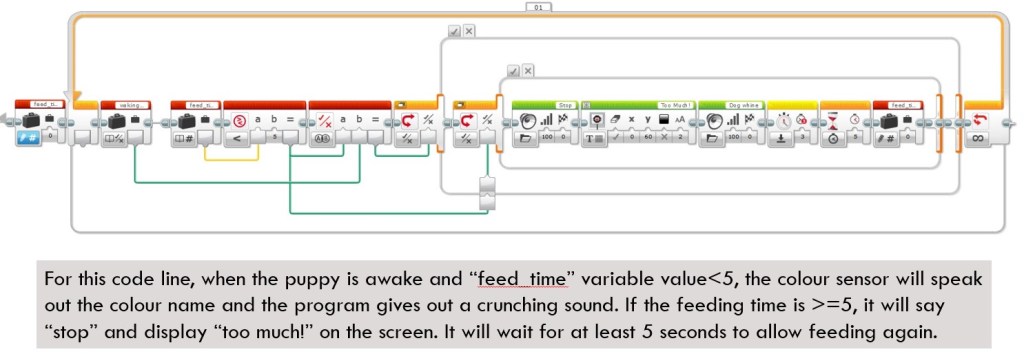
Identify Color
Identify color block simulates the feeding of puppy. It should happen when puppy is awake and “feed_time” value <5. The logic behind is that when you give puppy too much food, it will say “No!” and the screen will display “too much!”.
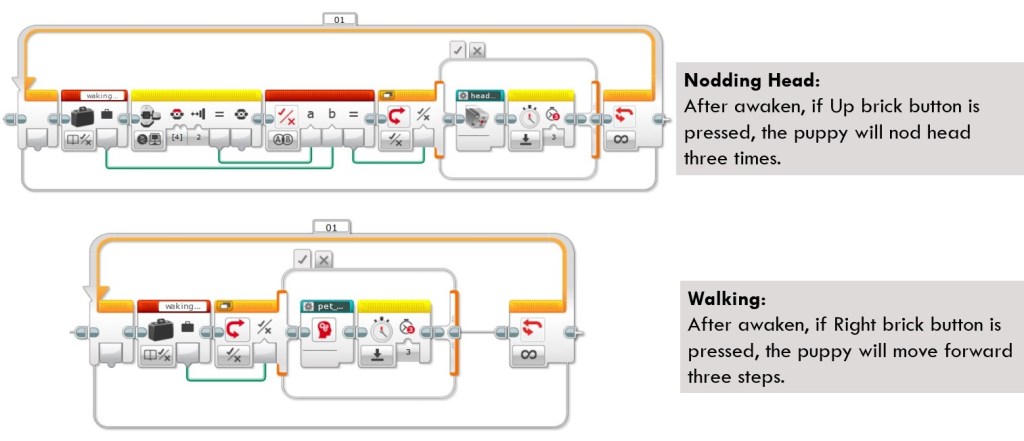
Nodding Head and Walking
In these two code lines, the program adds more features for the pet puppy. When Up brick button is pressed, the puppy will nod head three times. When Right brick button is pressed, it will run three steps by switching rear leg positions. To make things more reasonable, those actions should be done when “waking_up” variable is True.
Since the code lines could run parallel, the puppy could do several actions at one time.
Other Actions
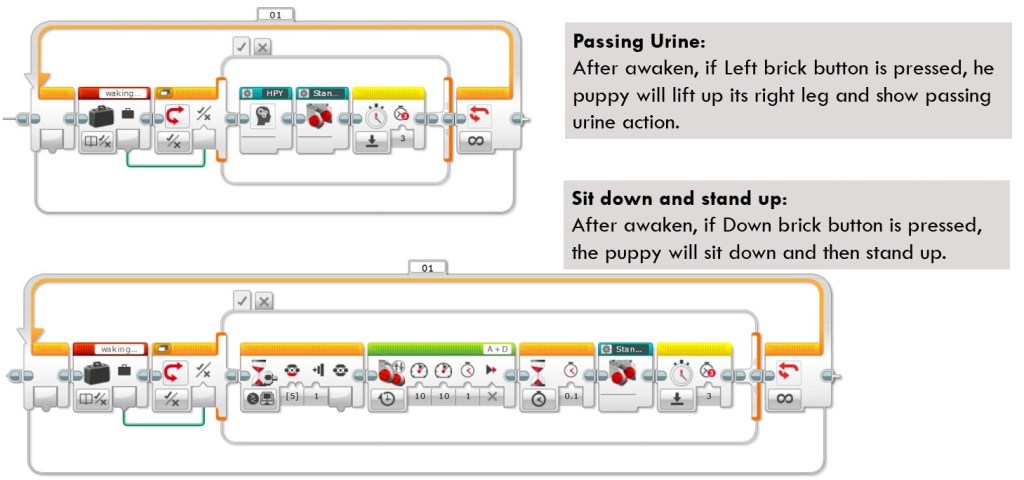
In my program, I add Passing Urine behavior, and Sit Down and Stand Up behavior. You could add other actions you’d like.
Code Overview
So how to combine the above code segments together to form a complete program? The following is an overview of the code map. Through using parallel running method, different functions are separated clearly but can be run simultaneously.
Please pay attention that parallel running does not mean that each code line has to be completely independent. For example, after each action (e.g. identify color, nodding head, walking step, etc.), the program will reset Timer 3 to zero. The resetting will influence the code segment of “Sleeping and Waking up”, so the counting of Timer 3 will restart and delay the entry of sleeping mode. A more precise way to describe the relationship between different code lines is interdependent.

That is all for this post. In the final post of this series, I will introduce those block definitions used by this program. Stay tuned for our further update!
Note: All the analysis articles are copyright products of http://www.thecodingfun.com. Anyone re-posting them should credit author and original source. Anyone using them for commercial purposes or translating them into other languages should notify TheCodingFun and get confirmation first. All Rights Reserved.

Like!! Great article post.Really thank you! Really Cool.
LikeLike
Hey, You’ve done an excellent job. I will definitely digg it and personally suggest to my friends. I’m confident they will be benefited from this website. all is going well here and ofcourse every one is sharing facts, that’s truly fine, keep up writing. gracias
LikeLike