

In my previous post, I introduced how to upgrade a LEGO MindStorms EV3 tutorial model (left picture) to a bit different model (right picture). If you are interested in that post, you could click here.

Many children feel it difficult to play LEGO technical sets at the beginning. It is no problem to build the model by following the instruction, but when talking about freestyle creation, even you have some model drafts in your mind, the difficult thing is more about how to connect different motors, sensors and sub models together.
In this post, I will introduce some of them when referring to the above drive base model and upgrade model.
Use Different Connector Pegs
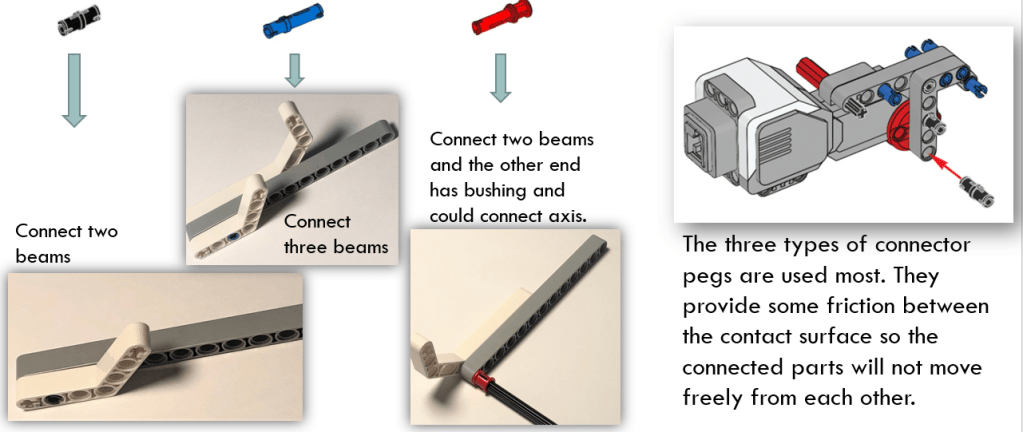
The black, blue and red pegs are the most commonly used ones. They provide friction between contacting surface so the connected parts can not move freely, but they are not fixed firmly. You need to have at least the other peg to form a sturdy connection.
Use Axis to Connect Different Parts
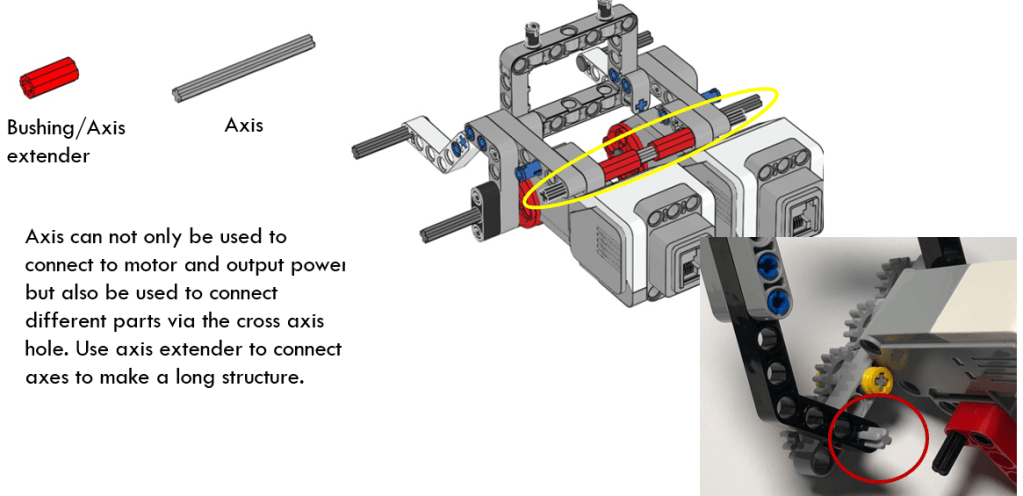
Axis can not only be used to connect motor to output power but also be used to connect different parts. If axis passes through cross hole, it can form a sturdy connection without having to use another peg or axis.
As shown in the above diagram, a long axis passes through the cross holes on the top of the motors and fixes them together. The design uses axis extender (red color) to form a longer axis. The axis extender also plays the role of strengthening the structure, avoiding overloading of axis.
In the other diagram, the axis inserts into the cross hole of a beam. When the axis rotates, the beam connected to it will sweep.
The Powerful Frame
5 * 7 Frame
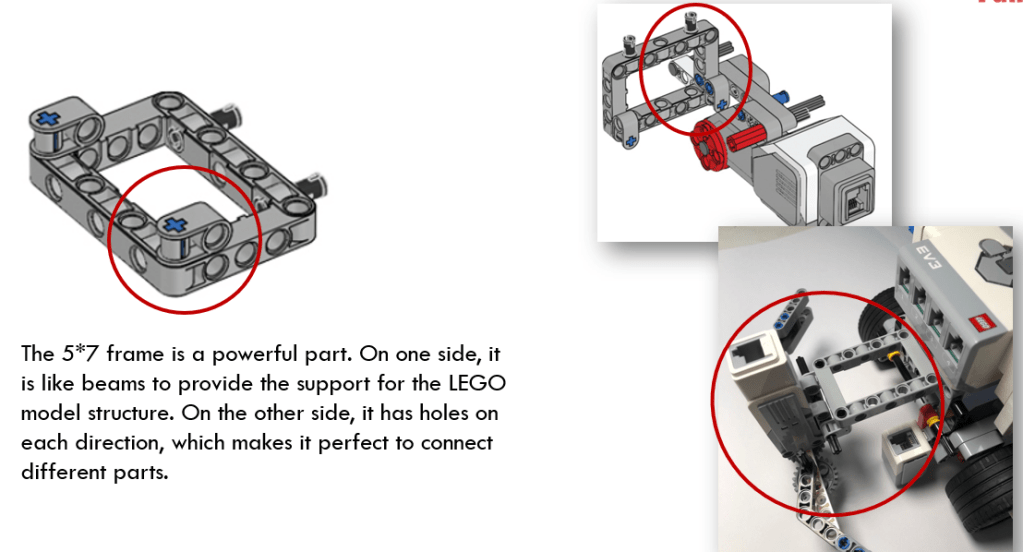
The 5*7 frame is a power part in the LEGO MindStorms EV3 set. It is rectangle shape and there are holes in every direction. Since it is big enough, it is like a panel to provide support for the LEGO models. It can also combine with other connectors to form a composition structure.
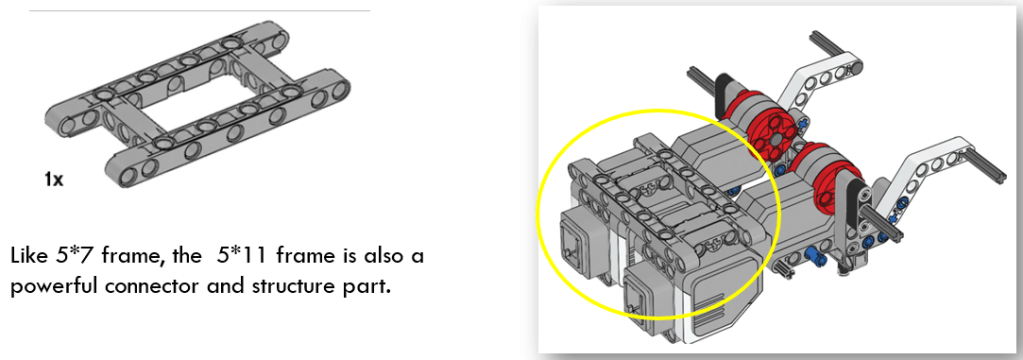
5 * 11 Frame
Similar to the above 5*7 frame, the 5*11 frame provides power connection capability. The only disadvantage is its size. It could not be used in a narrow space.
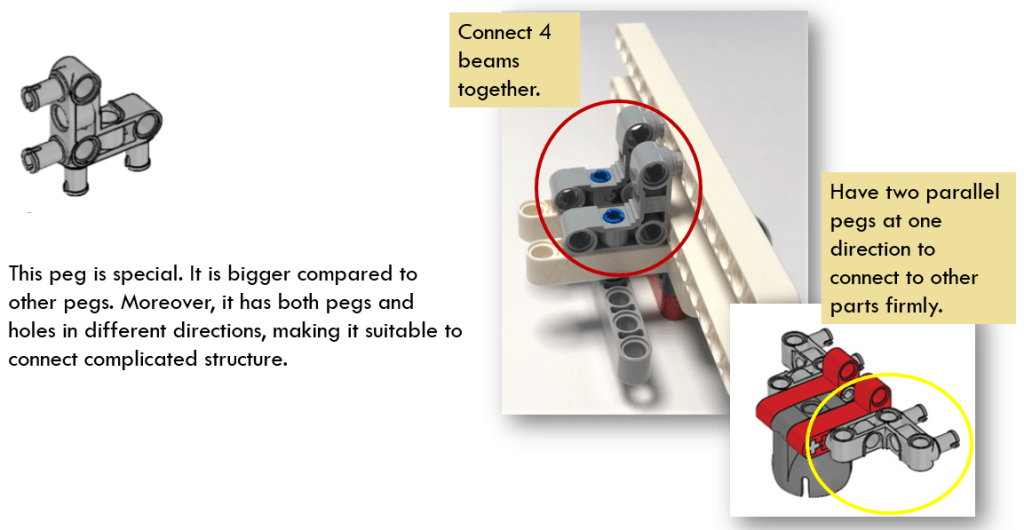
Versatile Angular Connector Peg
This part is a combination of pegs and connectors itself. It has 4 pegs distributed in perpendicular directions, and connection holes in three perpendicular directions. Because of this peculiar structure, it is suitable for complicated connection problem.
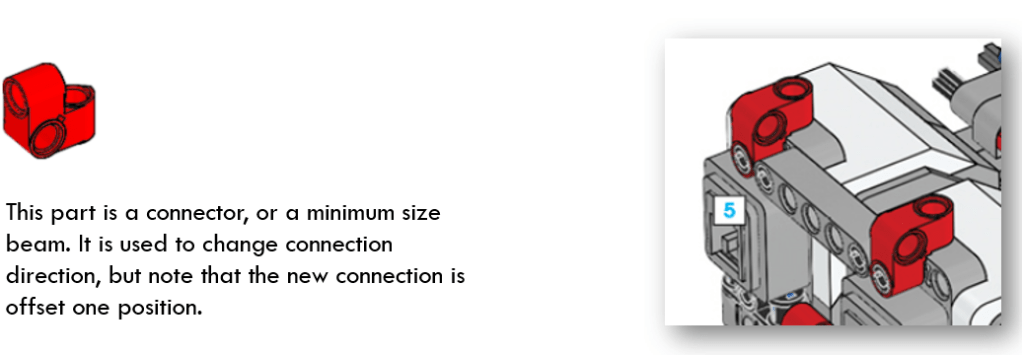
Use Cross Beam to Change Connection Direction
A common usage of the cross beam is to connect it to a beam with a peg, and then the other two pin holes facing perpendicular directions could connect to other parts.
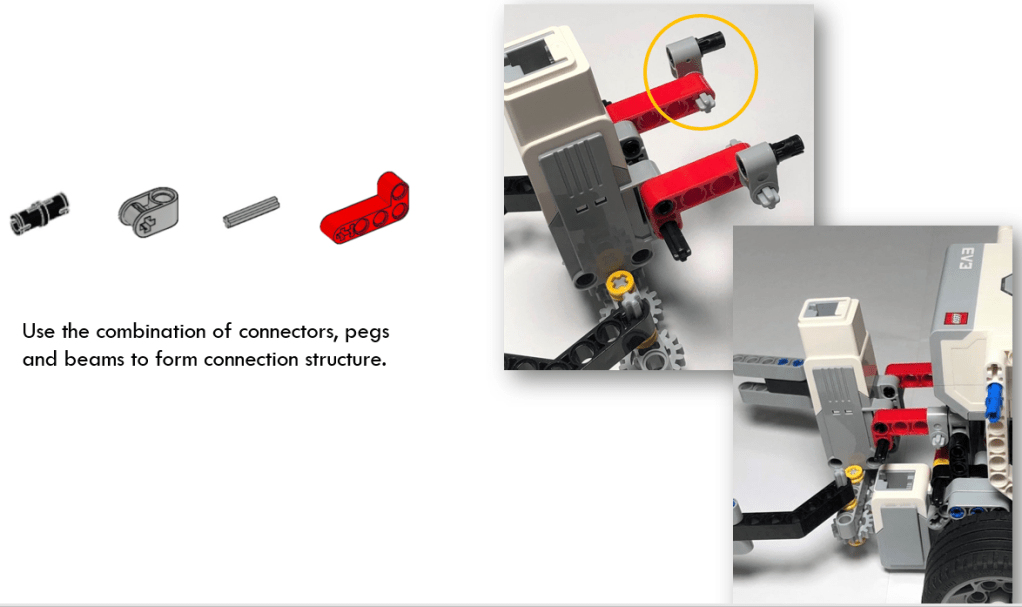
Form a Composite Structure
Under many conditions, we need to integrate those connectors, pegs and axis to form a customized connection. In the below example, one side of the red beam is connected to the medium motor through an axis, and the other side connects to a cross block (gray color) through a short axis (gray color). Then the cross block connects with a black peg and the latter is inserted into a frame to realize the final connection.
Summary
LEGO MindStorms EV3 set provides a variety of connectors and pegs. Although they are small in size, they play an important role in connecting different parts of the model. Without knowing how they work, it is not possible to build a robust model. In the following post, I will continue introducing the usage of different connectors, so keep tuned and enjoy your creation!
Note: All the analysis articles are copyright products of http://www.thecodingfun.com. Anyone re-posting them should credit author and original source. Anyone using them for commercial purposes or translating them into other languages should notify TheCodingFun and get confirmation first. All Rights Reserved.

I am really impressed with your writing skills as well as with the layout onn your blog.
LikeLike