
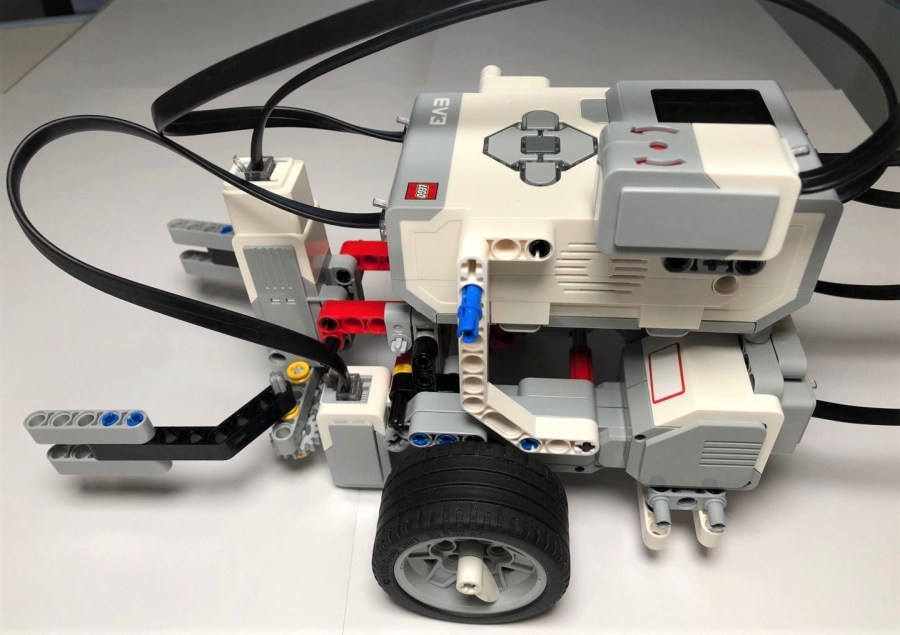

Anyone playing LEGO MindStorms EV3 would be very familiar with the above model. It is provided in LEGO MindStorms software as a tutorial model. If you are interested, you could find the step-by-step instruction in the software, as shown below.

The tutorial driving base is a good start to design other more complicated models. It demonstrates how to build a wheeled vehicle and attaches different sensors to it.
Once you build it and play it for a while, you will find its limitation and would like to “upgrade” it. Therefore, in this post, I will introduce my way of upgrading. Hope it will give your some inspiration to create your own robots.
Upgrading Purpose
I have found several areas to make improvement:
- The original model is a bit too packed in the middle. I want to make it wider.
- I will attach color sensor and gyro sensor to the model.
- I will build a front attachment which can grip objects.
The following is what I have done.
Extend the Width of the Model

As I mentioned, the original model is a bit too packed for its body, so I will use a longer axis to replace the shorter one, which is highlighted in yellow circle. Please also note that the longer the axis, the bigger torque it endures. We could add beams in appropriate places to strengthen the structure and reduce the torque on the axis. The two white beams play such a role here.
Adjust Fixing Parts

Since the model has been widened, the original frame structure could not be used because its size is not suitable now. We need to design a new structure which could strengthen the structure and at the same time, provide a place for the ball bear to attach to.
Adjust Ball Bearing’s Connection Part

Since the new structure (the white beams in the above picture) is different in height, the ball bear’s connection structure should also update. Now the structure is simpler but not as sturdy as the original one.
An Extra Beam to Compensate for the Width Adjustment
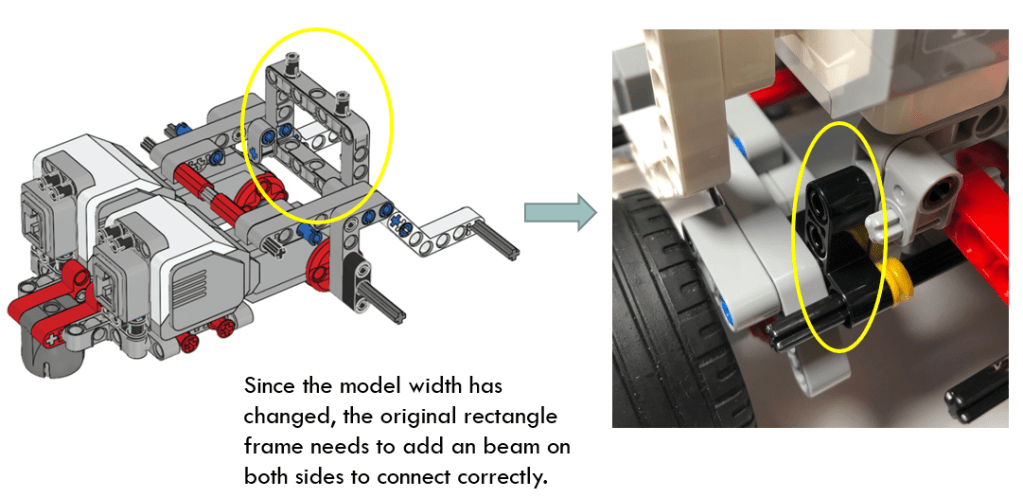
As the model width is enlarged, the original rectangle frame is not wide enough to connect to both motors. Therefore, we need an extra frame (T-shape black beam) on each side to fill in the gap and connect successfully.
Attach Color Sensor

The color sensor could attach to the front of the model by using axis passing through the pin holes of the T-shape beam. Done!
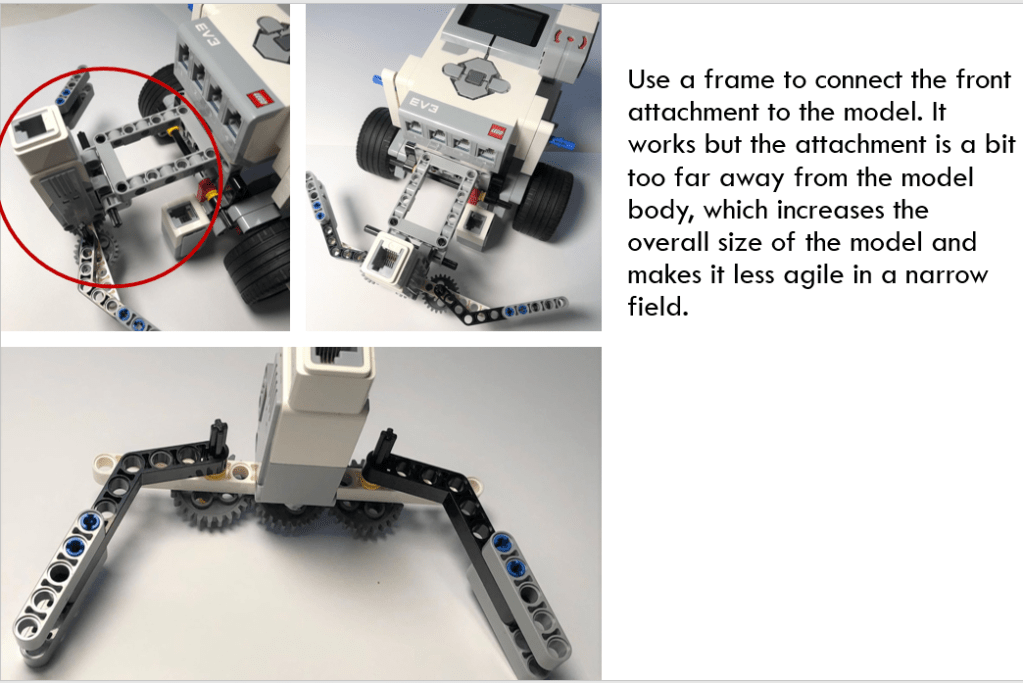
Front Attachment Solution – 1
Finally, I will design a grip which will hook into the front of the model. When carrying on its task, the robot could catch an object and then move it to the destination.
I will use gear chain to drive two gears moving in the opposite direction. The gears are driven by a medium motor. In this design solution, I use 24-tooth gears so it occupies a long beam. In order not to interfere with the color sensor, this solution uses a rectangle frame (7 position in length) to attach to the model, which increases the overall size of the model and makes it less agile in a cramped field.
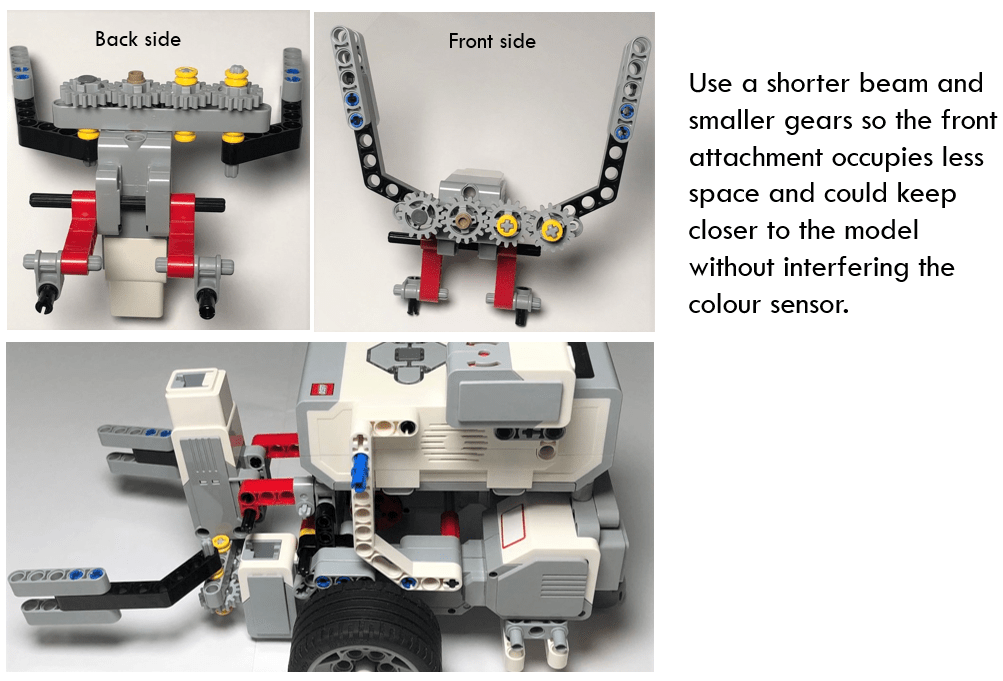
Front Attachment Solution – 2
In this solution, I replace 24-tooth gears with 16 tooth-gears, so the overall size is much smaller. With that, I uses a shorter beam to fix those gears. The front attachment could keep closer to the model without interfering the color sensor. Since the rectangle frame is not necessary, I have to create a fixing structure by combining pins and beams.
Insert gyro sensor into the holes alone the smart hub and connect ports with cables. Upgrading work is done!

Summary
Mechanical design is an important part of robot design. For LEGO Technical sets, beams and connectors replace the traditional stud structure. It is challenging for the kids which get used to the stud bricks. However, if you practice more and get familiar with those parts, you will find the powerful functions of technical beams. Get inspired and create your own robot, and then use program to make it alive!
Note: All the analysis articles are copyright products of http://www.thecodingfun.com. Anyone re-posting them should credit author and original source. Anyone using them for commercial purposes or translating them into other languages should notify TheCodingFun and get confirmation first. All Rights Reserved.

hi there, your article is very good.Following your news.
LikeLike
Pingback: Build LEGO MindStorms Models Beyond Instruction? Learn How to Use Connectors and Pegs Effectively – Part 1 – Coding Courses Designed for Kids