

If you develop a game with Pgzero or PyGame, you might want to invite your friends to play it. However, some of your friends do not use Python, so they do not have the Python development environment, or you do not want to share your Pgzero code at that moment. How do you wrap your PgZero game into an .exe file so as to throw them to your friends and just play them?
In this post, I will introduce how to use PyInstaller to package your PgZero (or PyGame) projects into a single file. Let’s start!
Please note the following steps refer to some posts such as Steps to Create Executable using PyInstaller, but some special new steps are added to ensur successful setup.
Pre-condition:
Here, I will assume that you have installed Python on your machine and have a Python Pgzero game run successfully. You are only waiting to wrap it into an executable.
Step 1: Install a PyInstaller
If you serach Internet, you might see that the most popular tool is PyInstaller. You might notice another similar tool called “auto-py-to-exe”, which is essentially a GUI wrapper for the PyInstaller library. Although GUI offers some convenience, some options are not working well when creating executable PgZero game, so I will strongly sugggest you install PyInstaller. The installation is simple:
1 – open command prompt window.
2 – type “pip install pyinstaller” and press Enter key.
Step 2: Copy the Whole Python Folder
Most of times, you could create executable for any Python project, no matter where they are located on your computer. Here, I will keep things simple and avoid any possible glitches. My step is:
- Copy the whole Python project folder (including the sub folders) to your Home Directory. On windows, the home directory is usually located at C:\Users\(your_user_name)
- Ensure that there is no space characters in your folder name.
The following is my copied position for a Python project, just for your reference.

Step 3: Run PyInstaller Command
Now, you could run PyInstaller command in CMD window. It seems that till now, my steps are just those typical ones mentioned by the other posts. but wait! This is not the last step.
Before we move to the next step, I will introduce the purpose of each parameter in PyInstaller command used here.
“–colllect-all pgzero” means to collect all the submodules, data files, and binaries from the specified package or module. Here, the Pyinstaller will collect all the files within the PgZero module. Without specifying this option explicitly, the building process will fail.
“–onefile” parameter means that the final executable is a simple file (on Windows OS, it is .exe file).
“–clean” parameter means that PyInstalle caches and removes temporary files before building. This is to ensure that previous failed building will not influence the next trial.
The last parameter specifies the python file you want to build. Its name will be used for the final .exe file. In the following example, the generated .exe file will be named code-challenge.exe. If your Python file has different name, feel free to use it.

Step 4: Stop the above installation process and edit .spec file
As we know, there are two sub folders within the PgZero project. One is “images” folder which is used to store all the image files. The other is “sounds” folder which is used to store all the sounds files, including .ogg or .wav formats. We might also need a “fonts” folder if your code renders text on the screen. This “fonts” folder will be mentioned again in the following step.

Right after we initiated the above step three process, the PyInstaller will create a .spec file within your folder to initiate the building process. You do not need to wait till the building process stops. Press Ctrl + C to stop the above building process of step 3.
Now we need to edit that .spec file to add the sub folder information, otherwise, the generated .exe file could not run at all.

You could open code-challenge.spec file with any editor, and then add the following text (marked in red line). The purpose is to add sub folder information “images” and “sounds” to the installation package. This is because when PyInstaller makes the executable, it will put all the files in the same temporary folder. Any sub-folder structure won’t be kept – all files will be flattened to the root. However, PgZero projects need the two sub folders to store image and sound files, so a flatterned file structure will make PgZero fail to find the correct path to image and sould files.
Pyinstaller offers a workaround. If you want to include the files in their same directory structure in the building process, you can specify them in “datas” parameters in .spec file, as shown below.

In the above .spec example, only the red lined text should be edited, and all the others are generated automatically in the above step 3. For the “datas” parameter, we could see that each part is organized as a Python tuple. In each tuple, the first item specifies the original folder position (“/*” represents all the files under this sub folder), and the second item represents the folder name in the building process.
After finishing the above editing, save the .spec file.
Step 5: run the Pyinstaller command using .spec file
Now we could run the .spec file and wait till the whole building process stops like this:

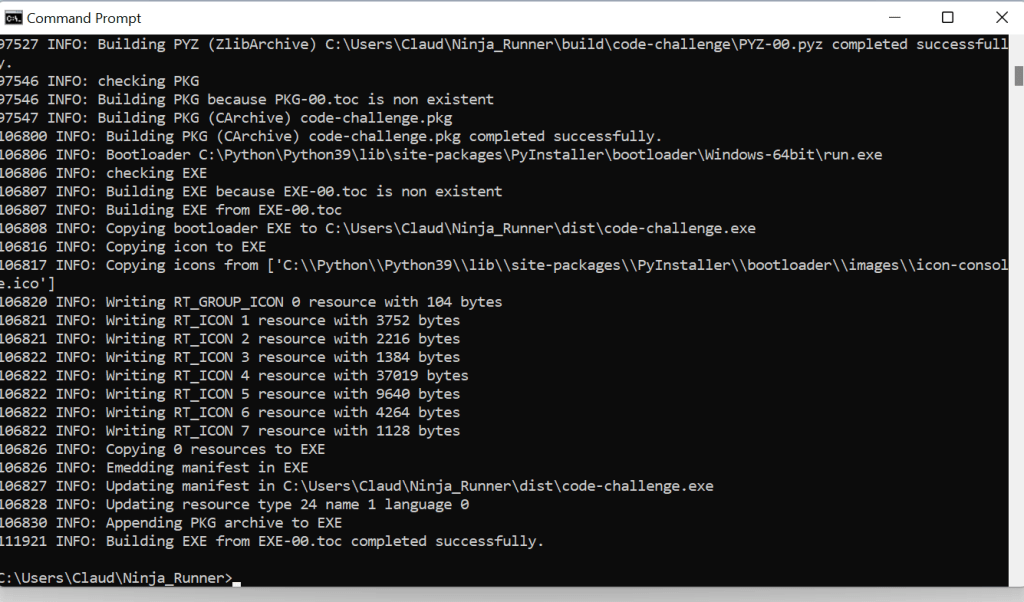
Step 6: Run the generated .exe file
After a long waiting (might take a few minutes), if your CMD window shows the above information, the whole process has finished. You could find an .exe file within the sub folder “dist”. Double click the .exe file to run it or drag it to CMD window, press Enter key to run it.

At this moment, if there is no error in the building process, you could see the PgZero screen pop up and you could play the game.
However, sometimes, a successful building does not necessarily ensure a successful running. You might need to debug to see if there are still some files not included in the building process.
Here, I will just give one example.
Step 7: (Optional) Render Text Problem
If your Pgzero Game renders text on the screen, at the above step 6, you might find an error and the system prompts that it could not find the font name. This is because the PgZero uses the default font type which is stored in your OS system. PyInstaller did not include the font into the building process. To solve this problem, just find the font type you would like to use and copy it to the sub folder “fonts”. Then repeat step 5 and step 6.
The font including steps are like this:
1 – Through “Control Panel\Appearance and Personalisation\Fonts”, you could find all the font types stored for OS system.
2 – Copy one or several fonts you would like to use in your project to your project sub folder “fonts”, as shown below.
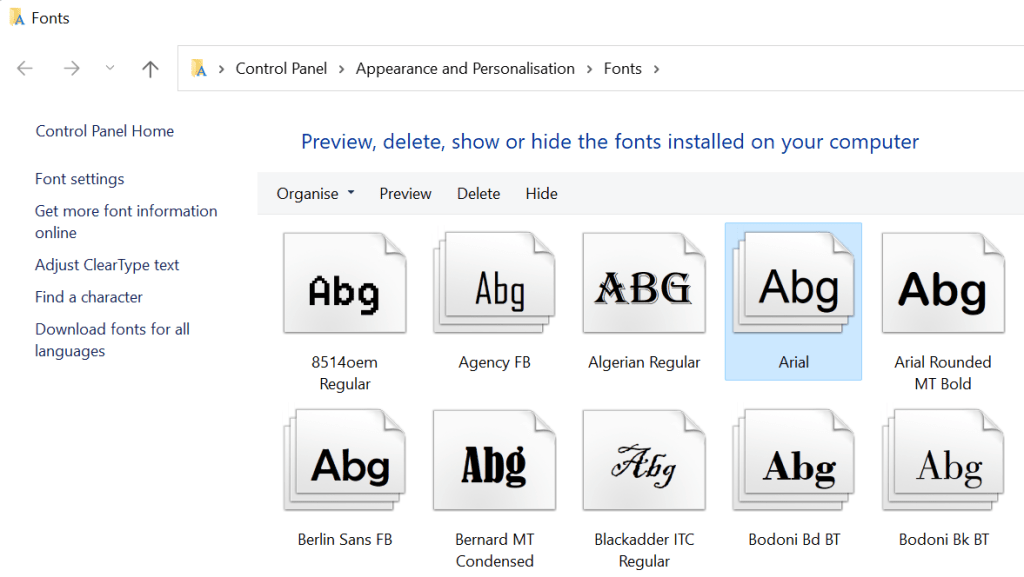
Here, I copied the font “Arial” to the sub folder “fonts”

3 – Update your Python code to use the font type explicitly, as shown below.

Now, update your .spec file to include the “fonts” sub type, just as I have done in the above picture of step 5. Run step 5 and step 6 to see if the building process succeeds. Good luck!

That is all the steps for using Pyinstaller to build PgZero project. Actually, it is not as easy as what spec of Pyinstaller says when you have the first try. There are always some special conditions which influence the final result. Whenever there is an error in step 5 and step 6, take a look at the error message and analyze where the problem comes from. Search the Google to see if others encouter the similar problem and how they solve it.
For this next post, I will introduce how to generate an executable file on Mac machine. The steps are similar but we need to handle some Mac related issues. Keep tuned!
Note: All the analysis articles are copyright products of http://www.thecodingfun.com. Anyone re-posting them should credit author and original source. Anyone using them for commercial purposes or translating them into other languages should notify TheCodingFun and get confirmation first. All Rights Reserved.

Hello, if you do not mind, you could give me the link of your project, let me try it on my side
LikeLike
I tried to do this many times but always at step 3 it gave me an error:
384 INFO: PyInstaller: 6.6.0, contrib hooks: 2024.4
384 INFO: Python: 3.12.1
423 INFO: Platform: Windows-10-10.0.19045-SP0
Script file ‘code-xxx.py’ does not exist.
I tried a lot and even auto-py-to-ex. Nothing helped
LikeLike