
Assuming you have created a LEGO vehicle with the robot LEGO MindStorms Inventor, now you would like to use its remote control function to control it manually. What should we do? In this post, I would like to introduce a simple vehicle model and the code to realize remote control. Finally, I will explain how to transfer the project from your computer to mobile device and vice versa.
The final effect would be like this:
Vehicle Model
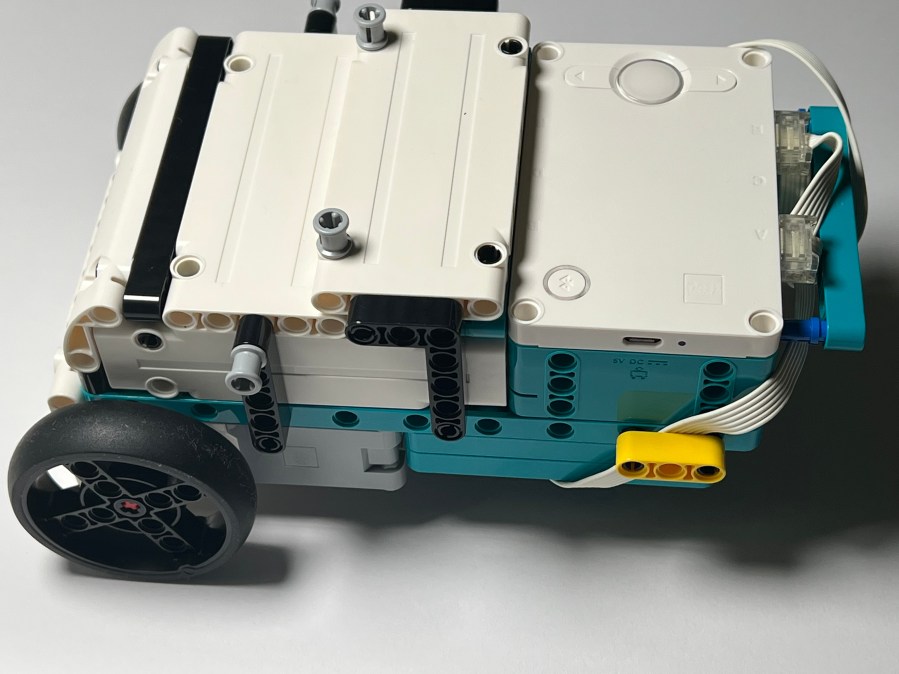
This vehicle model is just for demonstration purpose, therefore, its structure is kept simple. There are no any sensors mounted on the vehicle. The two wheels are mounted to two medium motors respectively to drive the vehicle. The third wheel is a swivel wheel, allowing the tricycle turn swiftly when two motors spin at different speeds.


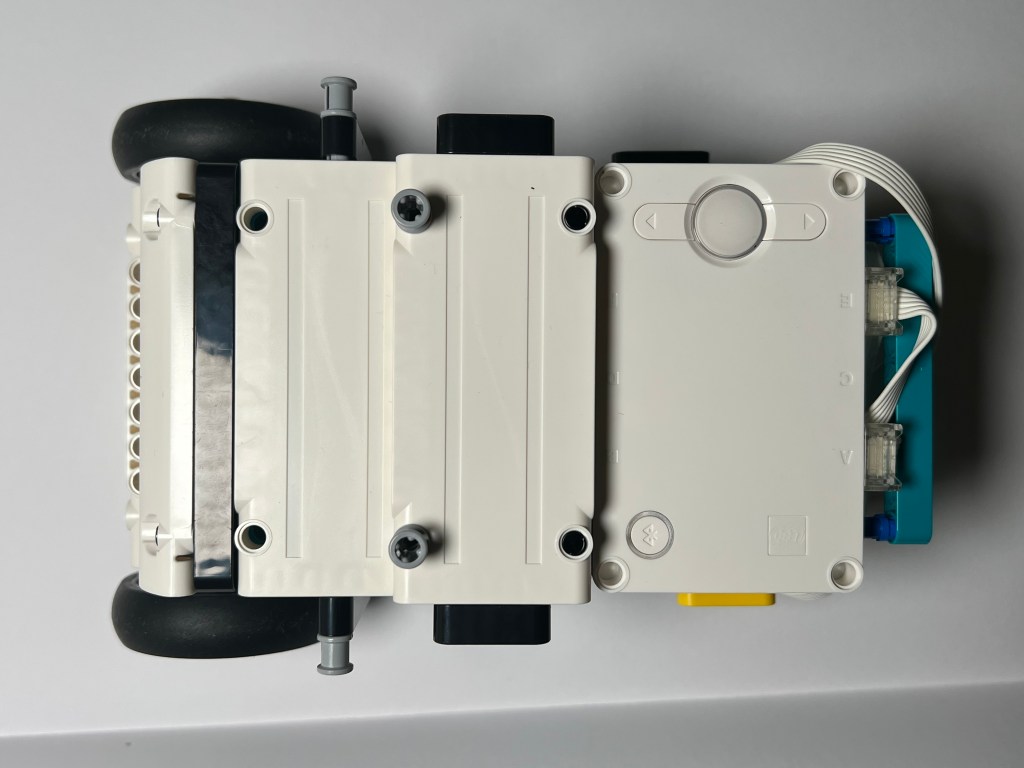
This is the bottom view of the model. Thanks to the updated design of motors, it is much convenient to fix the motor to the green 11×19 plate. The swivel wheel is also fixed to the plate with two black frictional pins (see below image).
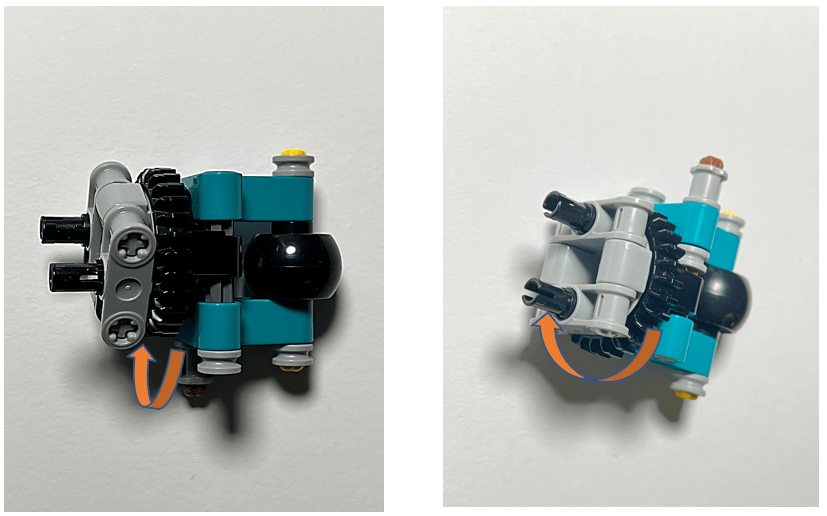
The swivel wheel should keep the vehicle body horizontally stable and it could spin freely. However, in LEGO MindStorms Inventor, there is no swivel wheel as what is included in LEGO MINDSTORMS EV3 or LEGO Spike Prime. We need to create the swivel wheel structure which could spin freely in any direction by ourselves. Here, we use the black turntable connecting to the small black wheel to form the core structure. Since turntable could spin freely, the black wheel acts as swivel wheel to roll freely on the ground.
The above introduction covers the core parts of the model. Once everything is ready, we could decorate this model and cover its body with those white panels. Done!
Design Code of Remoting Control
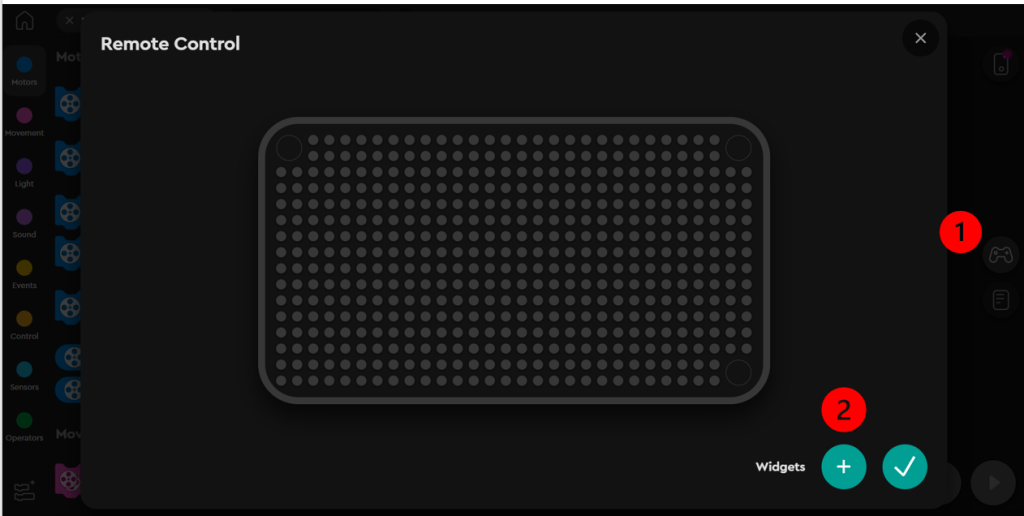
When adding remote control functionality, first, we need to create a new project. Click “remote control” button (step 1) in the window to display the remote control panel. Initally, the panel shows nothing, as shown below. Click “+” button (step 2) to add widgets.
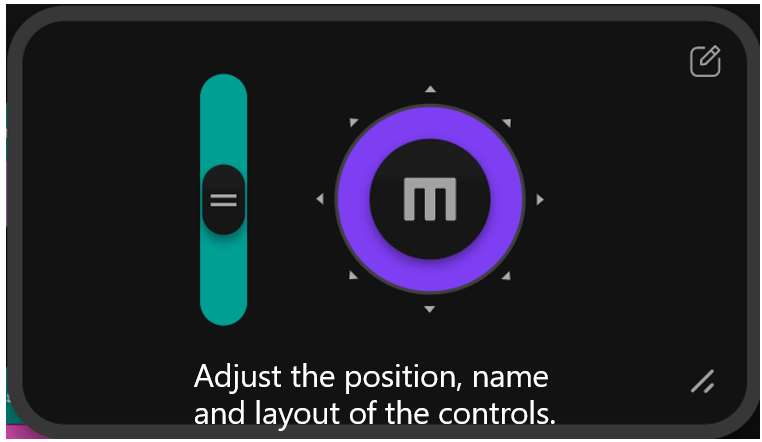
The following screen capture shows all of available widget types. You could click a widget type to put it on the panel and then edit its name, adjust its position, etc.

Once finishing adjustment, you could click Tick button to close Remote Control editor. The newly added widgets are shown on the control panel. You will notice that the appearance of the control panel looks pretty like your smart phone. Correct! Later on, we will learn how to transfer this project’s code to the mobile device and then control the model on the tablet or phone.
After adding those remote control gadgets, the next step is to write code to implement the detailed controlling task. The following code snippet is just an example. When program starts, “set movement motors to A+E”. Here A represents that the motor on the left side is connected to port A. E represents that the motor on the right side is connected to port E. We need to ensure to specify the left motor’s port first, followed by the right motor’s port. Otherwise, your robot might move in a reversed direction.
From the “remote control” tab of toolbox, you could find those blocks such as “when joystick … is …”, or “when slider … is …”. Please note that not all the remote control blocks will show on this tab. Only those blocks applicable to the added remote control widgets will be present. For example, if the control panel has not Button widget, the block “when button … is …” will not show on the toolbox tab.
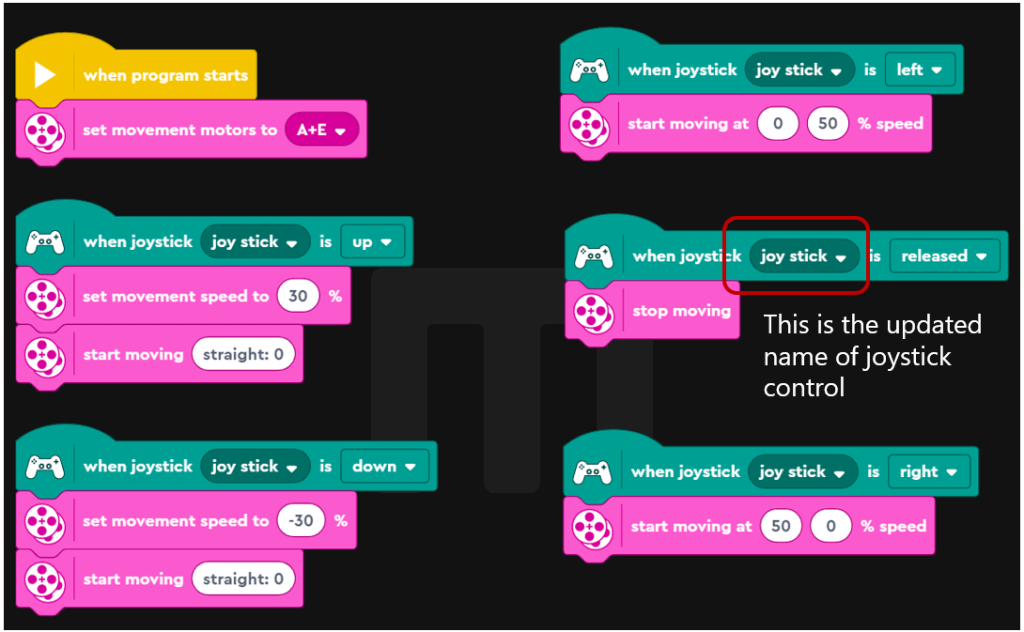
Please note that “when joystick … is released”, we use the block “stop moving”. That means, when we release the widget “joy stick”, the vehicle just stops moving. Designing code in this way brings better operability, but it is up to you to design the vehicle’s behavior, so it is not the only way.
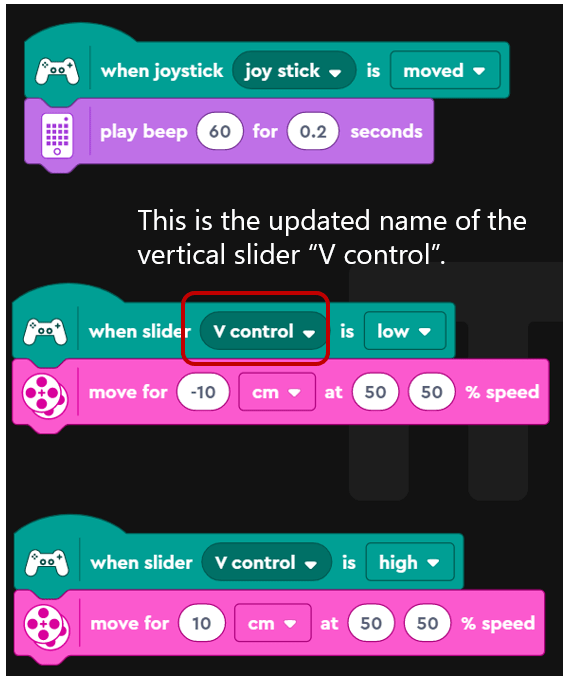
For the vertical slider “V control”, when we slide it higher, the vehicle moves forward 10 centimeters quickly, while sliding it down, the vehicles moves backward the same distance.
That is the coding part for this vehicle. For the purpose of demonstration, we just keep it as simple as possible.
Share Your Code Among Different Devices
Usually, I prefer to write code on my computer because bigger screen is easier to write code. However, it is definitely more convenient to remotely control the vehicle with mobile device. So should we rewrite all the code on mobile phone again? The answer is No. We just need several simple steps to transfer the whole project from the computer to tablet or phone, and vice versa.
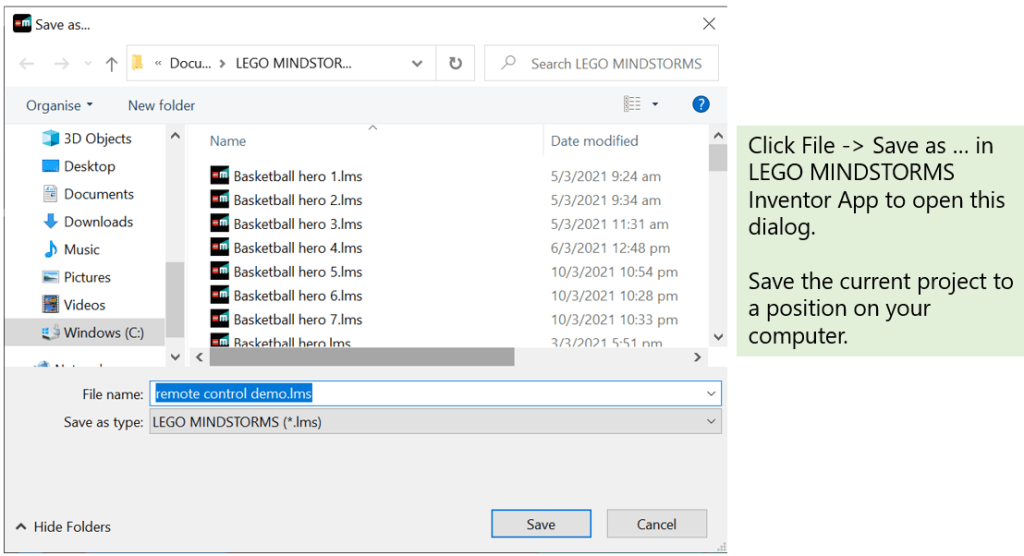
Step 1: click File -> Save as … in LEGO MINDSTORMS Inventor App on your computer to open this Save as … dialog. Save the current project on your computer.
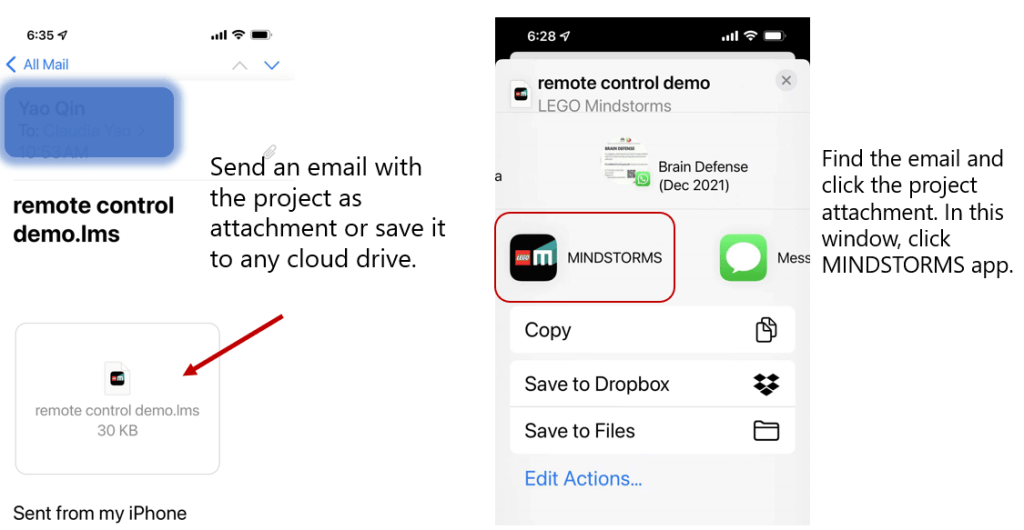
Step 2: You could send an email with this project as an attachment.
Step 3: Open this email on your phone. Tap the attachment, your phone or tablet will switch to the screen shown below on the right side. Choose MINDSTORMS app and the project has been imported.
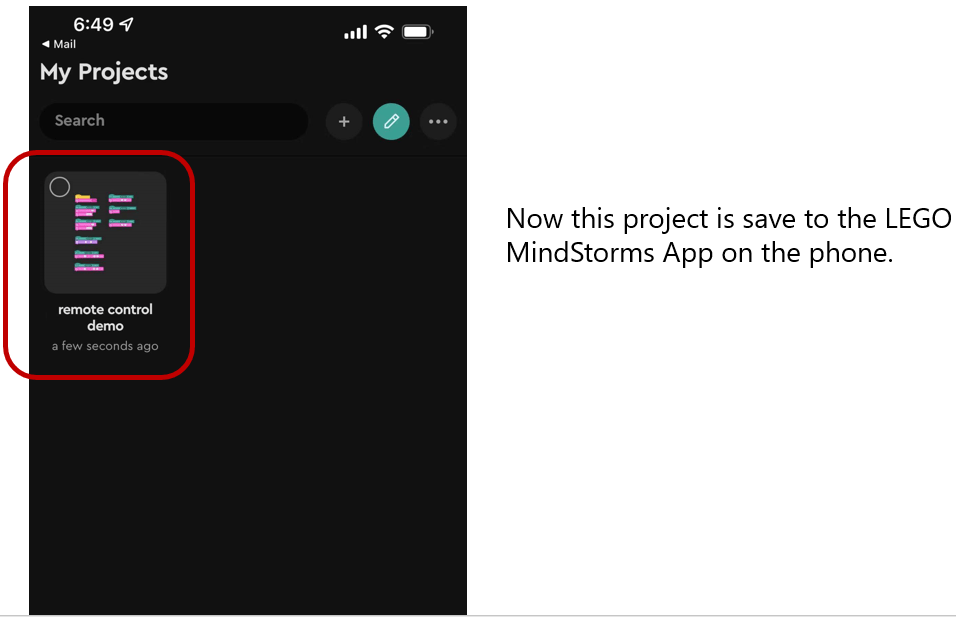
Step 4: Open MINDSTORMS app on your phone and check if your project shows and opens correctly.
That is all for the brief introduction of remote control functionality. Nothing mysterious about this, and now you could give it a try and make your vehicle rock!
Note: All the analysis articles are copyright products of http://www.thecodingfun.com. Anyone re-posting them should credit author and original source. Anyone using them for commercial purposes or translating them into other languages should notify TheCodingFun and get confirmation first. All Rights Reserved.
