
If you have interest in learning game development with PyGame, you might wonder where you could find sample projects for you as a reference. Actually, after you install PyGame module on your computer, PyGame automatically installs some projects for you.
So where could you find those sample projects? You could use the following method to identify their positions.
- In “search” toolbar of Windows 10, type “cmd” to open Command Prompt window.
- (Optional) If you have not installed PyGame, type “pip install pygame” command to download and install PyGame module.
- Type “Python” to activate Python.
- Type “import pygame.examples”.
- Type “pygame.examples.__file__”.
You could find the installation path of PyGame examples. The above steps are illustrated in the below image. You could see that on my computer, they are installed under “C:\Python\Python39\lib\site-packages\pygame\examples”.

You could find the PyGame related information on the website: https://www.pygame.org/docs/ref/examples.html
In this post, I will analyze one of the sample projects star.py to help you better understand how to use PyGame methods.
Star.py
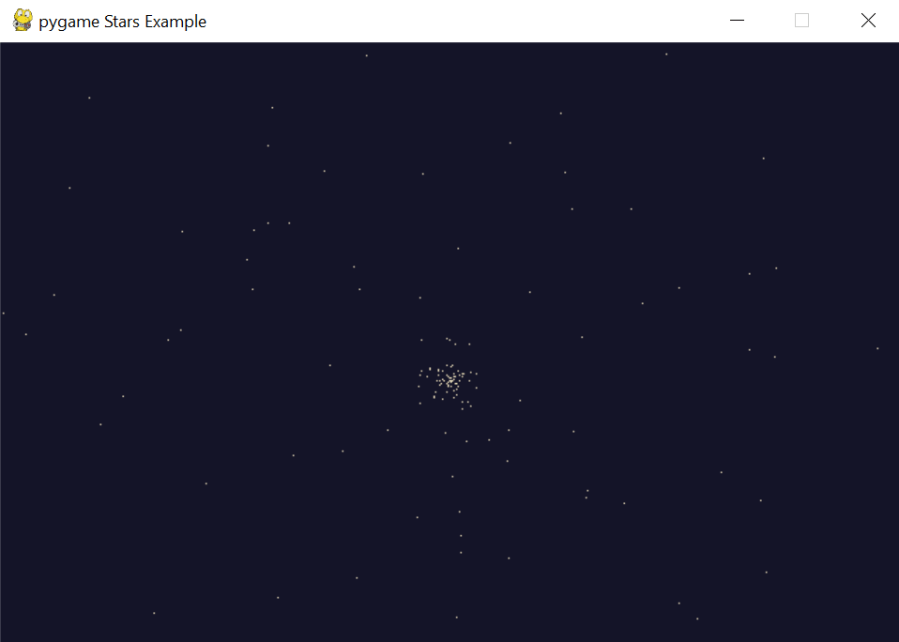
This project code is stored in Star.py. It demonstrates how to render(blit) a single pixel point on the main surface. When user clicks any place in the window, the mouse clicking position becomes a center to generate new stars.

At beginning, the program sets three constants, which represent window size, window center and number of stars. Putting them in front of any other method makes them global variables, so any method in this file could use them.
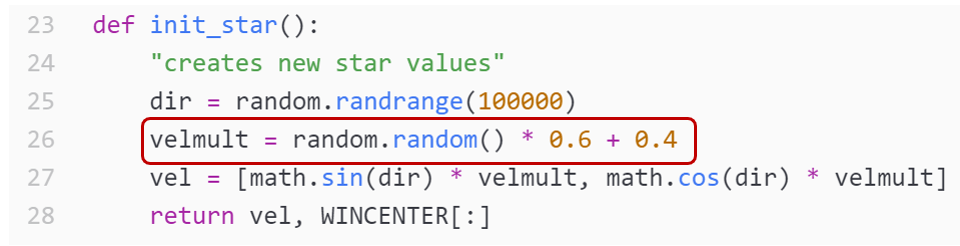
From line 23 to 28, the program defines a method called “init_star()”. This function is used to generate two random values through random module. One random value is “dir”, and the other is “velmult”. They work together to generate list “vel”, which represents the velocity in y and x direction, respectively.
More specifically, the random.random() method returns a random floating number between 0 and 1. Therefore, “velmult” is a value between 0.4 and 1.4. Although “dir” value ranges from 0 to 100,000, “dir” is used in math.sin(dir) and math.cos(dir). The output of math.sin(dir) and math.cos(dir) is a value between -1 and 1, representing the velocity of y and x direction.
After getting the values of “vel“, the function returns a tuple at line 28, whose first item is vel, and second item is WINCENTER. They represent all the necessary information for a star.

From line 31 to 44, the program defines function “initialize_stars()”. As its name says, it initializes all the stars. Within each iteration, the function calls “initialize_star” to get single star’s direction and position and saves them to variables vel and pos. It also creates a variable “steps” which is a random value between 0 and half of stage width. The purpose of line 38 to 41 is to further offset the initial position of stars, so when program runs, you will see stars scatter to different places.
After that, the function “draw_stars” is responsible for drawing star at the specified position. This function is straight forward. It just blits a pixel to the main surface at the specified position.

Line 54 to line 63 defines function “move_stars”. It retrieves vel and pos values of each star, updates its position by adding the velocity. After that, the function checks if star’s position has been beyond the size of window. If it does, it initiates a new star to fill in “vel” and “pos”. If the star is still showing in the window, velocity is increased to simulate the movement acceleration (line 62 and 63).
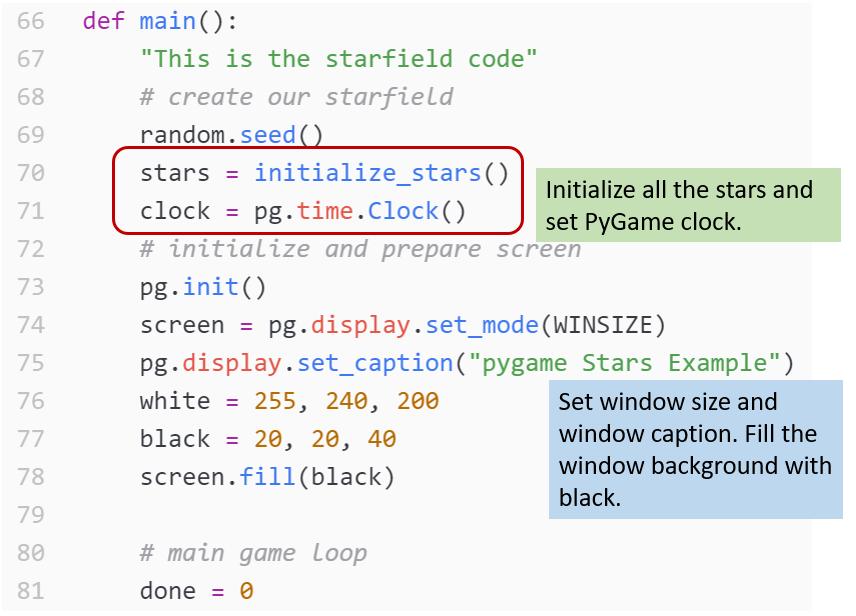
From line 66, the program defines “main()” function, which wraps all the stuff together to make the game run. From line 69 to 81, it calls function “initialize_stars()” to initialize all stars’ position and blits them to main surface. Like other PyGame projects, it also sets window size, window caption and window background color.
From line 82, the program enters main loop. Within each iteration, the first function of “draw_stars” draws stars with black color. The effect is to remove the trace of star at the old position. After that, it calls function “move_stars” to update star positions. The second function of “draw_stars” draws the stars at new positions with white color.
At line 86, the program calls “pg.display.update()”. This function is like an optimized version of “pg.display.flip()”. It updates the entire main surface.
From line 87 to line 93, the program monitors the keyboard and mouse events. When user presses Quit button of the window or Escape key, the program stops. When user clicks the left button of the mouse, the program updates WINCENTER with current mouse position. This setting will affect the initialization of new stars. When the main loop calls “move_stars()” function, those stars flying beyond the edge of window will get initiated with mouse position as their new center.

That is all the code for the sample project star.py. Compared to others, it is a simple project, without defining any class or handling the interaction between different sprites. It uses nested list to manage information. List “stars” contains all the stars showing in the window, while each star’s information is also stored in a list to indicate velocity, direction and initial position. You might wonder if we could define a class of star and if that would make the whole logic clearer? The answer is Yes. I will explain how to restructure this project in the upcoming post. Keep tuned!
Note: All the analysis articles are copyright products of http://www.thecodingfun.com. Anyone re-posting them should credit author and original source. Anyone using them for commercial purposes or translating them into other languages should notify TheCodingFun and get confirmation first. All Rights Reserved.
