
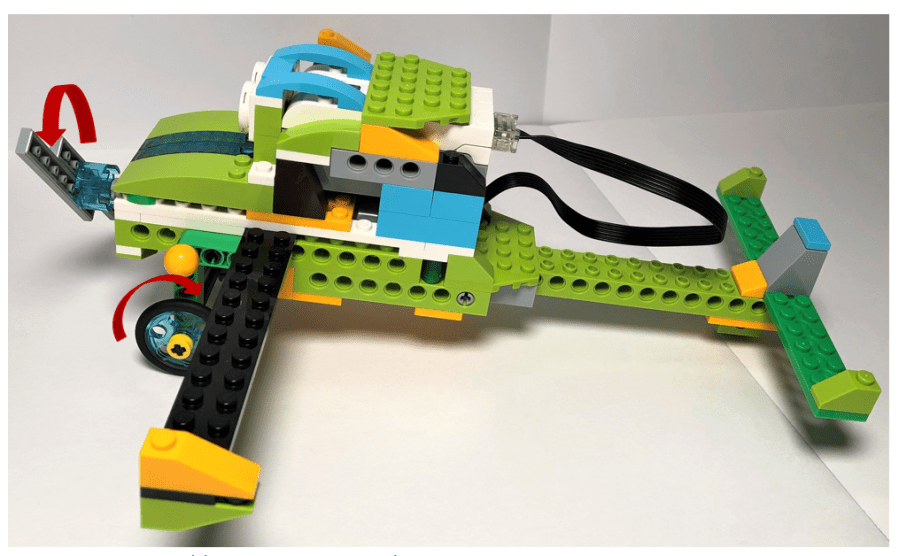
In my previous post, I analyzed an interesting LEGO WeDo 2.0 model – a helicopter model. It uses one motor to drive three moving components – the top propeller, the rear propeller and its two wheels. In this post, I will analyze another helicopter model which uses one motor to drive two components – a front propeller and its two wheels.
Both models come from one YouTube channel owner, and the original video on YouTube could be found here.
I will not introduce the step by step instruction, as the owner of the YouTube Channel has shared it on his website. You could access it on his website. As the introduction of the other helicopter model, I will briefly explain how the gears are arranged to split the power of one driving shaft to drive two components.
Bevel Gears
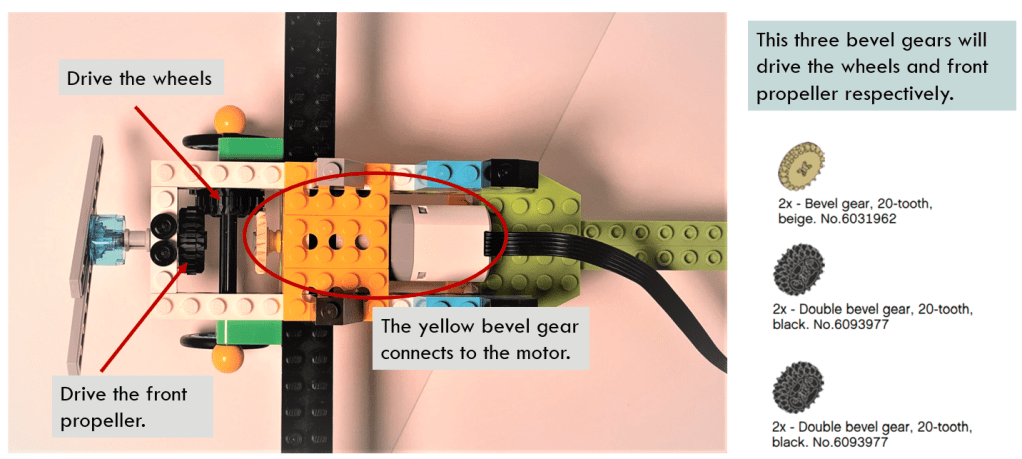
After the model is built up, the motor and the bevel gears are hidden inside the helicopter’s body. In the below diagram, I remove the decoration cover of its body, so we could see that the output shaft of the motor connects directly to a yellow bevel gear, which is perpendicular to the other two double bevel gears (black). The two 20-tooth black bevel gears will drive the front propeller and wheels respectively.
One black bevel gear drives the front propeller directly. The other black bevel gear could not drive the wheels directly since the position of wheels is much lower than that of the gear. The gear should further transmit the rotation power down to the wheels. I will introduce this structure in the below section.
Compound Gears to Transmit Power to Wheels
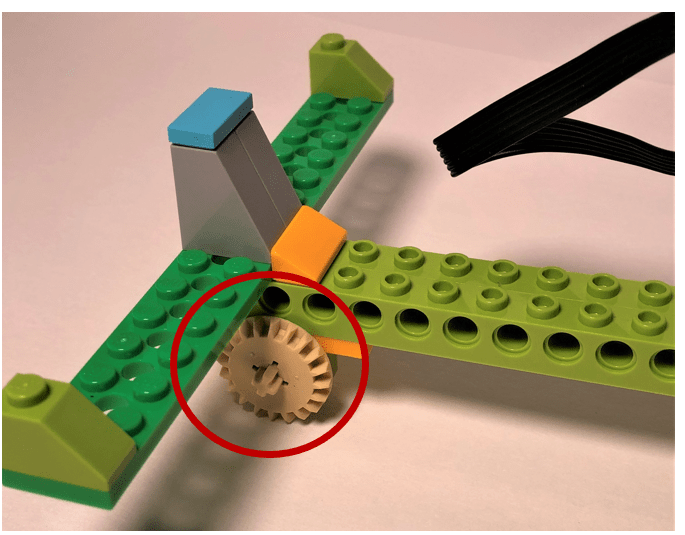
The below diagram shows the model in the bottom view. Two black gears are meshed together, which I indicate with red arrows. One 20-tooth black gear is just the one I mentioned in the above bevel gear structure. It meshes with a 12-tooth black gear, which then transmits the rotation power alone the compound gear train.
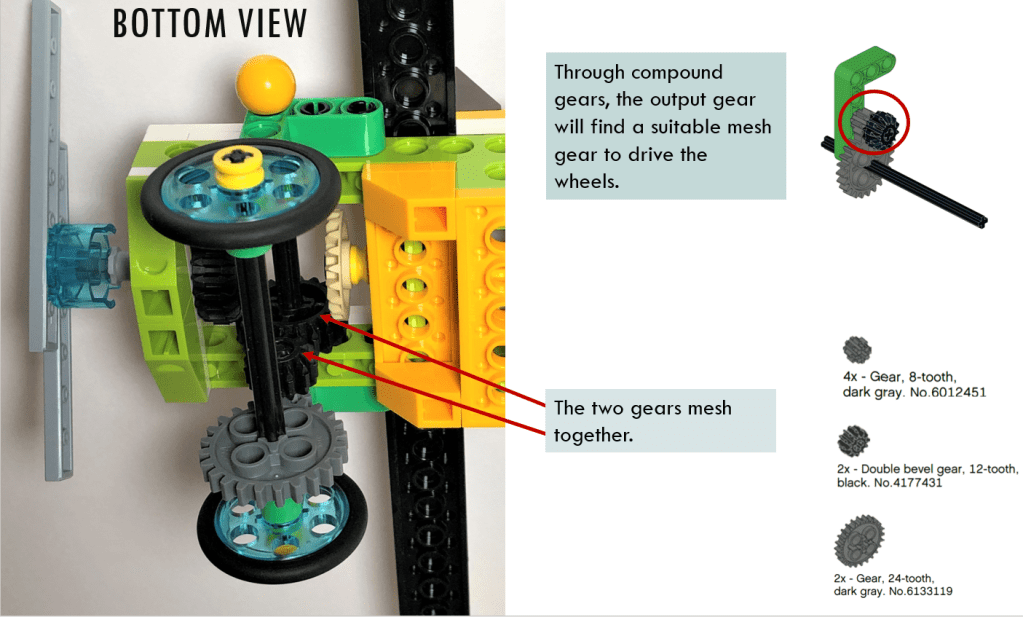
Please pay attention to the compound gear structure here. The 12-tooth black gear and the 8-tooth grey gear are fixed on the same shaft to form compound gears. The 12-tooth black gear spins and brings the 8-tooth grey gear to spin at a same speed. The 8-tooth grey gear then meshes with a 24-tooth spur gear to further transfer the rotation power downward. The 24-tooth spur gear connects the output shaft to drive the wheels finally.
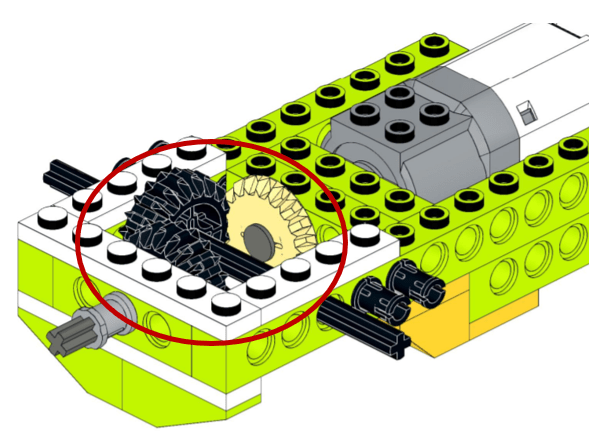
One example of compound gear is shown in the below diagram.

So what is the purpose for the model to use the compound gear? Using compound gear could change the output rotation speed, but one more important reason here is the distance mismatch. Assuming the distance between two adjacent spin holes of a beam is one-stud width, the shaft distance of the 24-tooth spur gear and the 20-tooth black gear is bigger than 2-stud width, but less than 3-stud width. Therefore, their shafts could not be arranged on the green beam. Through using the compound gears, the 24-tooth gear could mesh with the 8-tooth gear properly by arranging their shafts 2-stud distance apart on the green beam. In this way, the whole gear structure could work.
Free Rolling Rear Gear
Finally, it is the rear gear. The model uses a yellow bevel gear and connects it to spin hole with a friction-less plug. Therefore, the rear gear is passive-driven and rotates freely. It is responsible for keeping the model in balance horizontally. Meanwhile, using gear instead of skid could keep the friction as small as possible.
That is all for the brief introduction of the model. When we design a model which needs to split the power of motor to drive multiple components, the first and foremost part is to consider how to arrange and connect those movement parts (gears, belt, axles) properly. Once this part is done, the left is to design the shape of your model by using bricks, beams and other small decoration parts.
Enjoy the design and have fun!
Note: All the analysis articles are copyright products of http://www.thecodingfun.com. Anyone re-posting them should credit author and original source. Anyone using them for commercial purposes or translating them into other languages should notify TheCodingFun and get confirmation first. All Rights Reserved.

You must be logged in to post a comment.