

Recently, when I searched YouTube, I found a very interesting product made by LEGO WeDo 2.0. I was amazed by how the author realized the walking effect by only using the output of one motor.
Out of curiosity, I rebuilt this model following the instruction of video, and the following is my instruction. Some designs such as Santa Claus or the deer’s head are not strictly following the original ones. I will focus on explaining its key structures, bevel gear and the rotation offset structure.
First of all, let’s take a look at how the exquisite mechanical structure helps to realize this effect!
Overall Structure
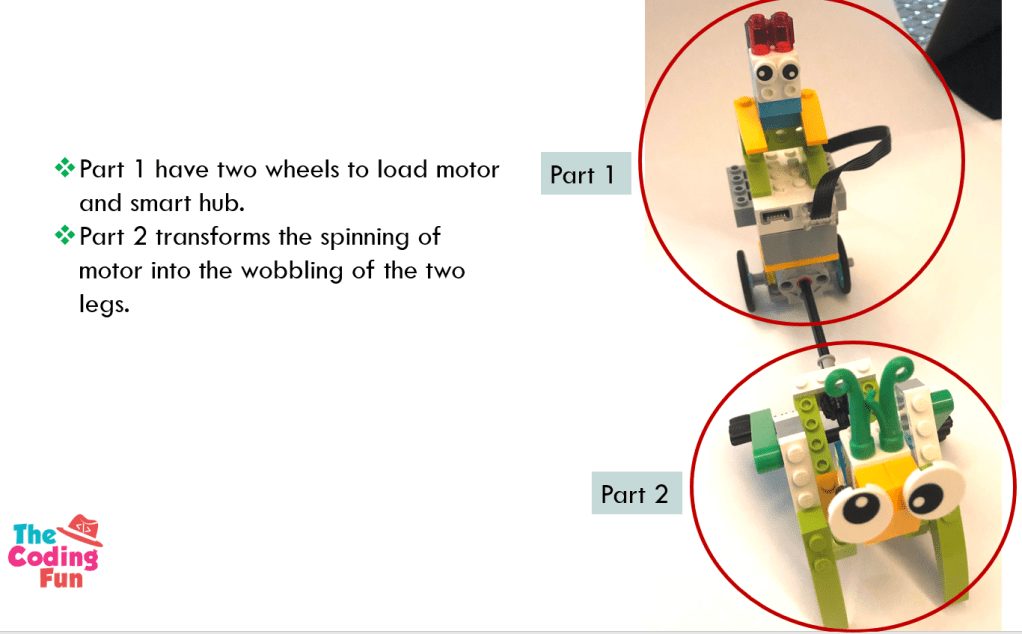
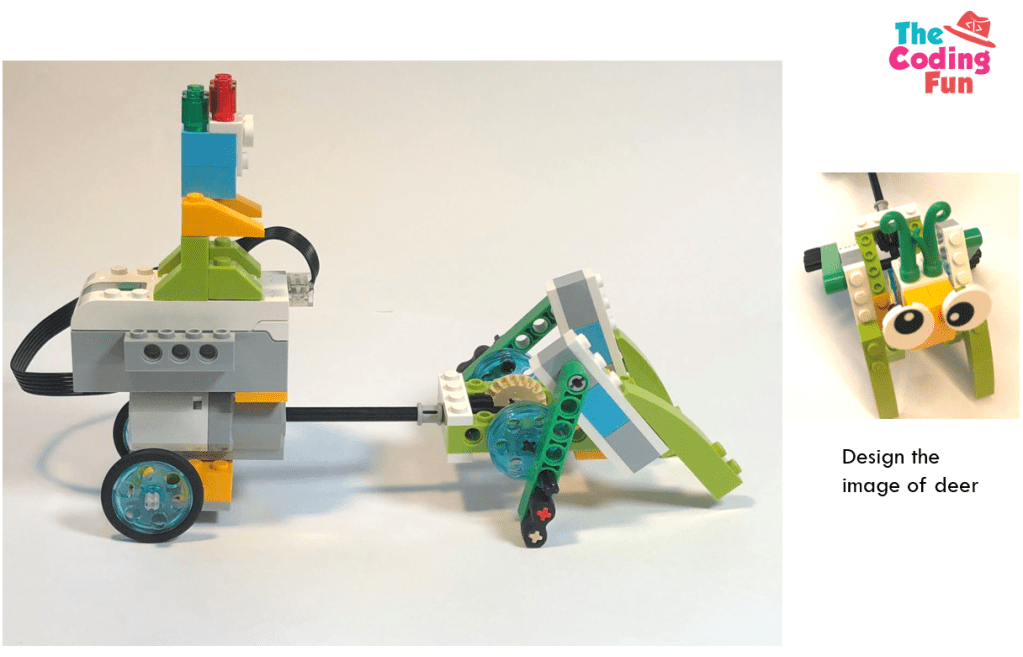
That is the overall structure of the Santa Claus model. The front and back parts are connected by an axis mounting to the motor.
Assembly of Part 1
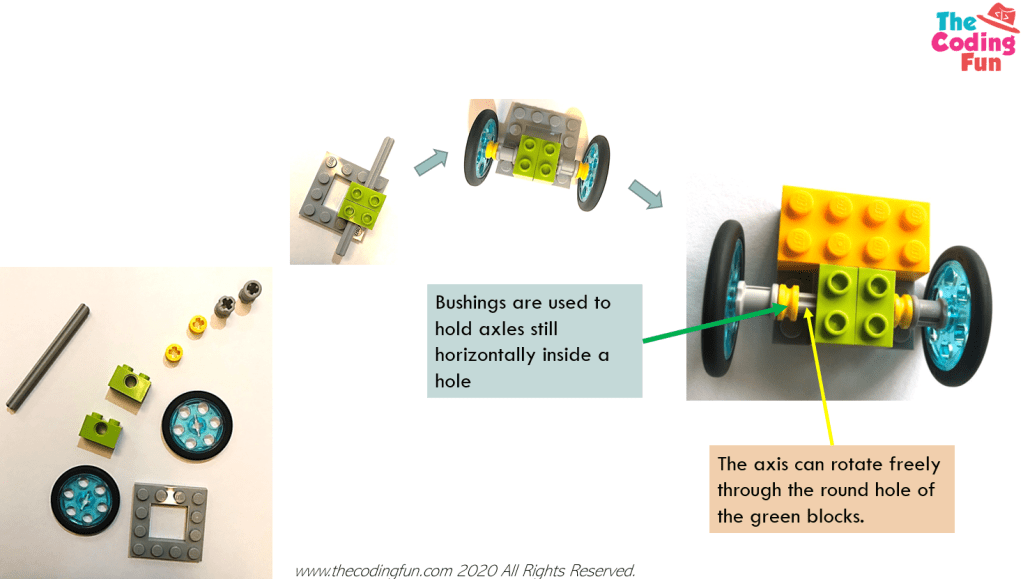
Structure of part 1 is simple. It builds a base (gray square block and two green blocks) to allow the axis pass through the round holes of the green blocks. It then uses bushes to hold axles still horizontally. After that, it attaches wheels to the both ends of the axis.
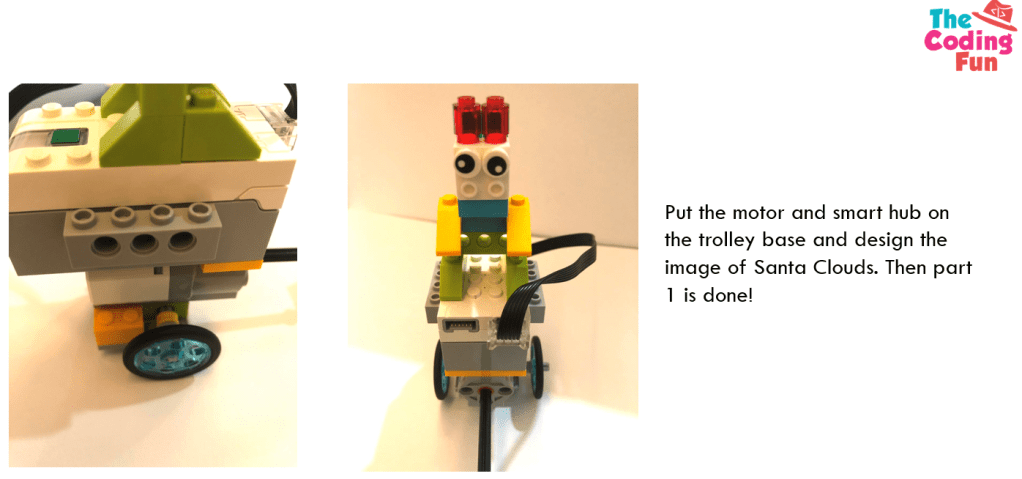
Finally, fix the motor and smart hub on the trolley, and decorate your Santa Claus with your imagination.
In general, Part 1 is much simpler than Part 2. You do not have to follow the same structure as this, just need to ensure that the motor is facing forward and there are wheels to carry the motor and smart hub and keep them stable.
Structure of Part 2
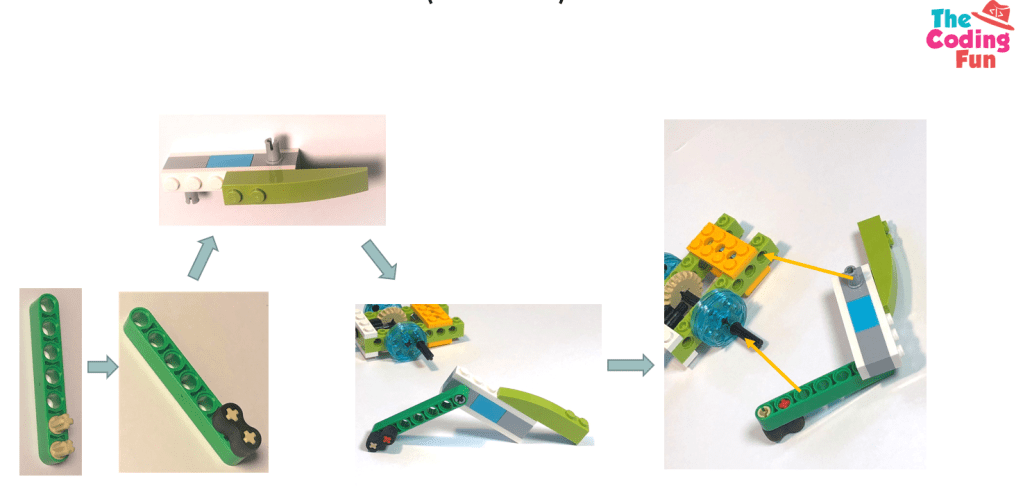
Part 2 is critical to realize the cool effect of the model. It first uses bevel gear to change the direction of axis. After that, the author creates offset shafts by inserting peg axis (black ones) into the round holes of wedge wheels (blue transparent wheels) . That is what the below left image shows.
The next step is critical, too. The author attaches beams to the offset shaft to convert rotation into wobbling effect, shown in the below right image.

If you browsed LEGO WeDo 2.0 software before, you could see that bevel gears had been introduced in one guided project – wobbling, which used the same structure to change the direction of axis.

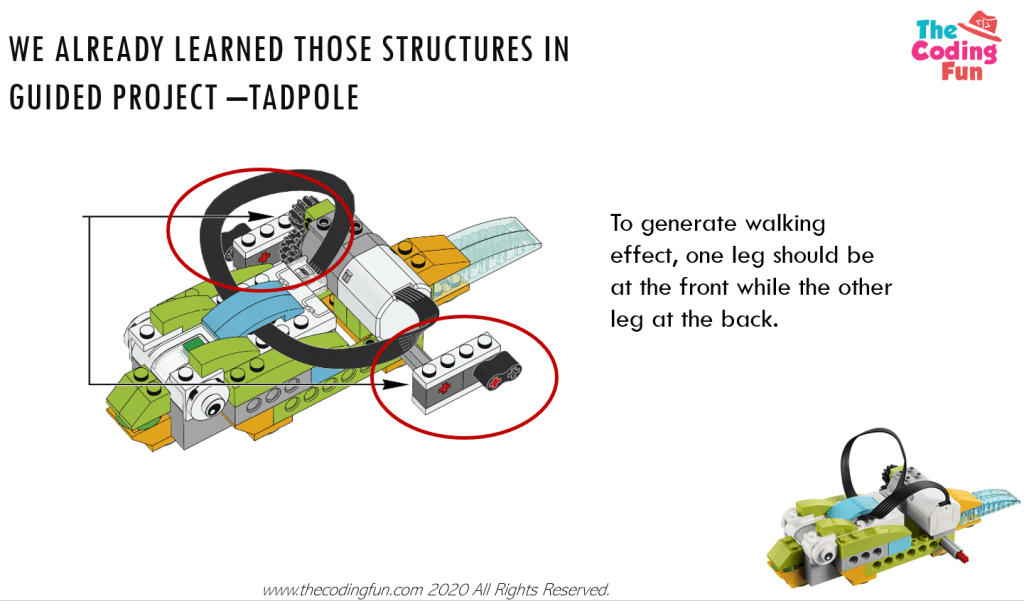
We could also find the offset shaft structure in one guided project – tadpole. In that project, the axis was passed through the axis holes of two blocks which are arranged in the opposite position horizontally toward the axis, so as to simulate the leg paddling effect (one leg at front and the other at back). What is more complicated in Santa Claus model is that the offset shaft is connected to two beams on each side. The final effect looks like that 4 legs are moving alternatively.
Assembly of Part 2
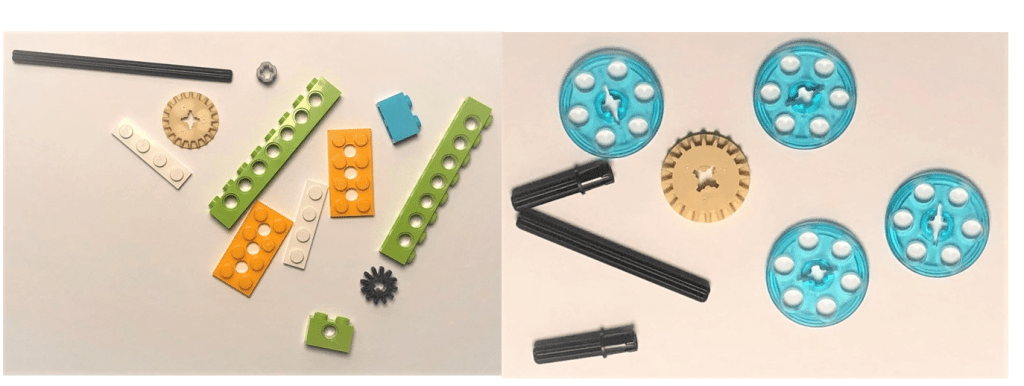
All of those parts can be found in LEGO WeDo 2.0.
Step 1, you need to set up the bevel gears first.

Step 2, set up the beam structure and then install them into the offset shaft. Remember that you need to have 2 beam structures, one for each side.
Finally, connect part 1 and part 2 with a long axis, and decorate the deer lively.
Coding
Coding is simple for this model. Just turn on the motor and let it run forward.


Pingback: Forklift Truck Model – LEGO WeDo 2.0 – Coding Courses Designed for Kids
Pingback: Spinner Model – LEGO WeDo 2.0 – Coding Courses Designed for Kids