
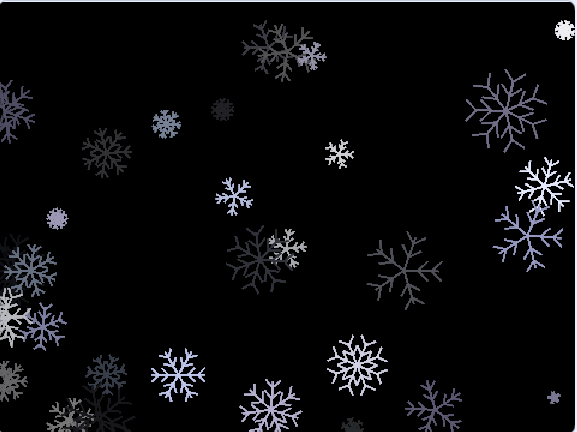
In this holiday season, no one could resist the joyful scene of falling snowflakes, especially against the backdrop of colorful decorations of Merry Christmas or happy year. So how to draw snowflakes in Scratch and then make them swirl down gradually? One idea popping in your mind might be to create multiple snowflakes sprites and then customize their movement route and other behaviors. That is implementable definitely, but in this post, I will introduce a project which solely uses pen functionality to draw those snowflakes. Let us enjoy it and see the fabulous effect of snowflakes!
The original Scratch project can be opened from this link: https://scratch.mit.edu/projects/348334475
In the following section, I will introduce how the author realize this effect and where the project is unique.
Thumbnail’s Code
Thumbnail sprite is simple. What author did was to make this sprite show up when the program started, stating the theme of “Snow”, then, this sprite would gradually fade away and became totally transparent.

Sprite 1’s Initiation Code
Sprite 1 is the only sprite in this project that realizes almost all of implementation. Let’s have a close look at it.
When program starts, Sprite 1 deletes all the items from Bright, Color, Rotate, Rivel, Sat, X, Y, Dist, Size and Rand lists. After doing the initiation, it erases all the drawing, and then begins to draw new snowflakes and update snowflake information for the next cycle. It will reiterate this process continuously.
It looks wired that the program erases the old drawing for every loop. Please continue reading this post if you want to understand the reason, because this is also where the unique design of this project lies in.
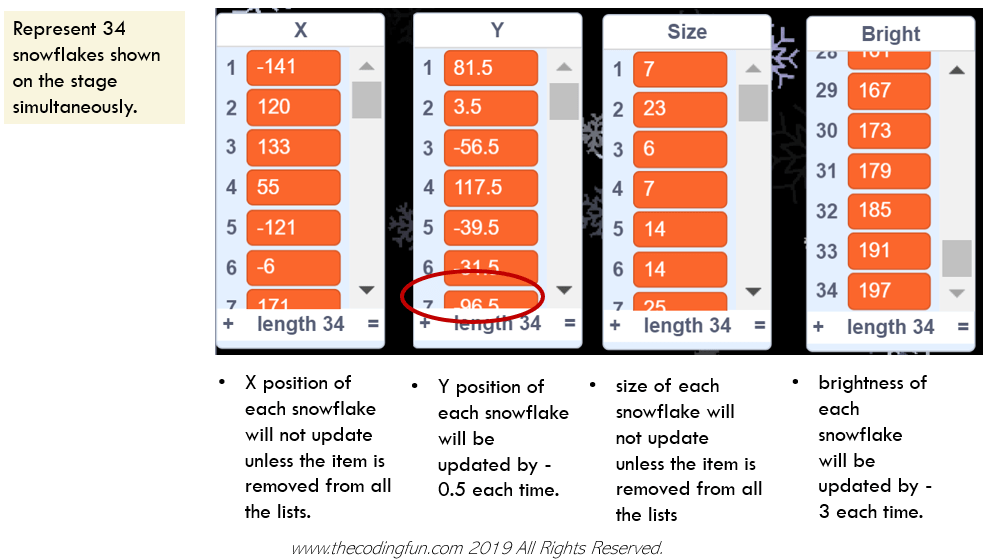
In a parallel “When Green Flag clicked” event code, the author filled in each list with the random values. Please note that this data filling will continue because you can that it is wrapped in forever block. You might wonder that in this way, the lists will become longer and longer. However, actually, all the list length is maintained around 34 (some moments, the length could be 32, or 33). Why? because in the below Update block, some items (bright value < 0 and Y value < -176) will be removed from the list. The author adjusts the list generating speed by using “wait 0.02 seconds”. Finally, The new generated list items and deleted ones compensate stably, resulting into an almost constant list length of 34. Interesting!
Sprite 1’s Draw Block Code
Draw block does not draw the snowflake directly. It is more focused on defining the properties of the pen, such as size, color, saturation, brightness, etc. It will repeat this process for “length of Bright” times, which just represents the total number of snowflakes drawn on the stage. The real drawing function is implemented by calling Snowflake block from Draw block inside. I will introduce this Snowflake block below. By now, you need to know that Draw block will draw around 34 snowflakes on the stage by utilizing the data stored in the multiple lists such as size, brightness, X, Y, rotate, etc. Each snowflake appears differently.
Continue the Draw block…
Sprite 1’s Snowflake Block Code
Snowflake block is the one which really draws the snowflake. It only draws one single side of the snowflake. As we know, each snowflake has a hexagonal shape. Interestingly, the author uses Rand (which is set randomly between 5 to 8) to represent the side number of snowflakes. Anyway, Let us respect the innovative idea of the author.
Therefore, for a snowflake with a rand of 6, the draw block calls Snowflake block 6 times to draw a single snowflake, and each side will turn 360/6=60 degrees from the previous side. For a rand of 8, the program will call Snowflake 8 times, and each side will turn 360/8=45 degrees. Utilize your math skills to understand this concept. 🙂

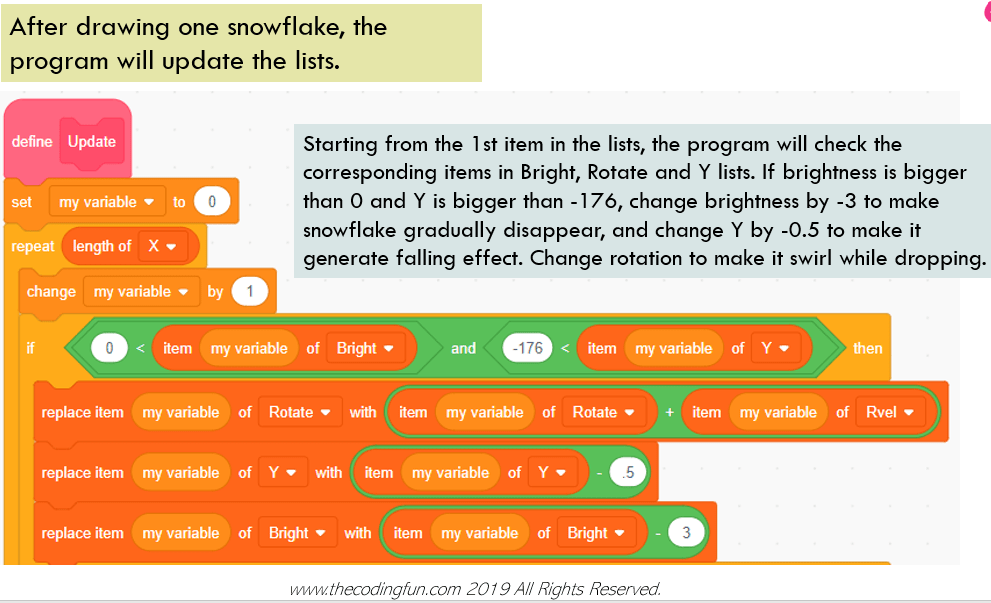
Sprite 1’s Update Block Code
Once the drawing action of 34 snowflakes is done, the program will update most of the lists. If a snowflake’s brightness is larger than 0 and its Y position is bigger than -176, it means that it will continue appear on the stage. The program will update the value in corresponding lists to adjust brightness, Y position, rotation angle etc. Instead, if a snowflake’s brightness is 0 or less than 0, or its Y position is smaller than -176, it means that it will disappear from the stage. Under this condition, the item’s value will be deleted from each list, and there will be new list item filled in.

Unique Design of the Project
The reason why I choose to analyze this project lies in its unique design. Instead of creating a snowflake sprite and making 34 clones, the project chooses to draw each snowflake separately. It stores all the relevant parameters in multiple lists. When the pen draws, it extracts the value from the list and draws it.
The project also introduces the randomness. No matter brightness, size, X position, Y position, or rotation angle, the author introduces the value with a reasonable range. The invalid item is removed from the list so as for new item to fill in.

Summary of the Analysis
Through learning this project, there are at least three points to take away. Let me summarize them below.
- Use separate lists to store the information of each single snowflake. Each list stores different information such as brightness, size, rotation, X or Y position.
- When drawing a complicated structure like snowflake, draw a single side, then rotate it a certain degree and repeat the same drawing process.
- After updating the item values of lists, the program erase the old snowflakes and draw new ones. Since computer can run super fast, our eyes would not feel the erasing process, but only see a continuous snowflake dropping picture.


Happy New Year and Enjoy Your Coding!

Note: All the analysis articles are copyright products of http://www.thecodingfun.com. Anyone re-posting them should credit author and original source. Anyone using them for commercial purposes or translating them into other languages should notify TheCodingFun and get confirmation first. All Rights Reserved.

Hi, thanks for your interest to the website. You could follow the blog via email and then receive an email whenever a new post goes out.
You could find this button on the home page, right side bar. There is a line called “Follow Blog via Email”, enter your email address and then click Follow button.
Or if you are already a member of WordPress, you could click the “Follow Coding Courses Designed for Kids” which is just below the “Follow Blog Via Email”.
LikeLike
Hey there I would like to subscribe for this webpage to get most up-to-date updates, thus where can i do it please assist. thanks
LikeLike