
For many game design beginners, the most exciting part might be to think about a creative or thrilling idea and then begin to put their favorite characters onto their well-selected backdrop. and the next step? they will begin delving into coding, encountering issues, changing their designs, feeling frustrated and moving on and finally, done!
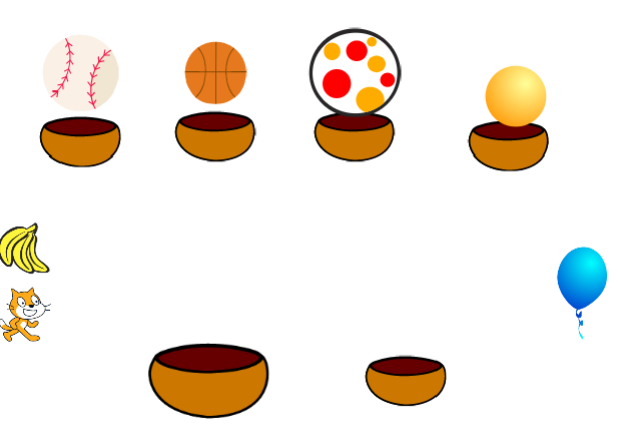
Just for a comparison: Initial version vs. Final version
Is there problem of the above procedure for game design? Unfortunately, there is big possibility that the final product is much different from what they original conceived, due to many reasons, such as the lack of thorough consideration at the initial stage, unable to overcome some technical issues, or just changing their mind and preference in the process of creation.
As a Scratch coding instructor, I am responsible for designing all of the game lessons for theCodingFun.com from Level I to Level 3. When designing those game projects for teaching, my experience told me that although it is a coding language suitable for children, the process for the game development definitely can refer to the best practice of popular code development methodology. It is shown below. That is a waterfall model, starting from idea brainstorming, rough design to detailed design, coding, testing, and finally visual effect optimization.
To illustrate this concept, I would use the game development process of “Water Pouring Challenge” to explain what are the steps for me to develop Scratch games.
1. Brainstorm ideas
My kids often gave me lots of innovative ideas for game design. In the popular game design projects, such as Car Racing, Adventure land, we will always design the game that kids like and then taught coding skills and knowledge in this process.
2. Consider the Rough Design
With the inspiration in mind, you get one paper and sketch out the layout of the interface. Just like a movie director draws the plots of the movie, you draw out the interface of the game, and illustrate the interaction between different sprites using words, the below picture shows, it is not an exquisite design, but that is not important at this stage. You draw out the position and layout of each sprite and describe their relation and interaction using pointers, words or short phrases. The purpose is to help you clear up the plot of the game and test whether the plot and idea is feasible or not.
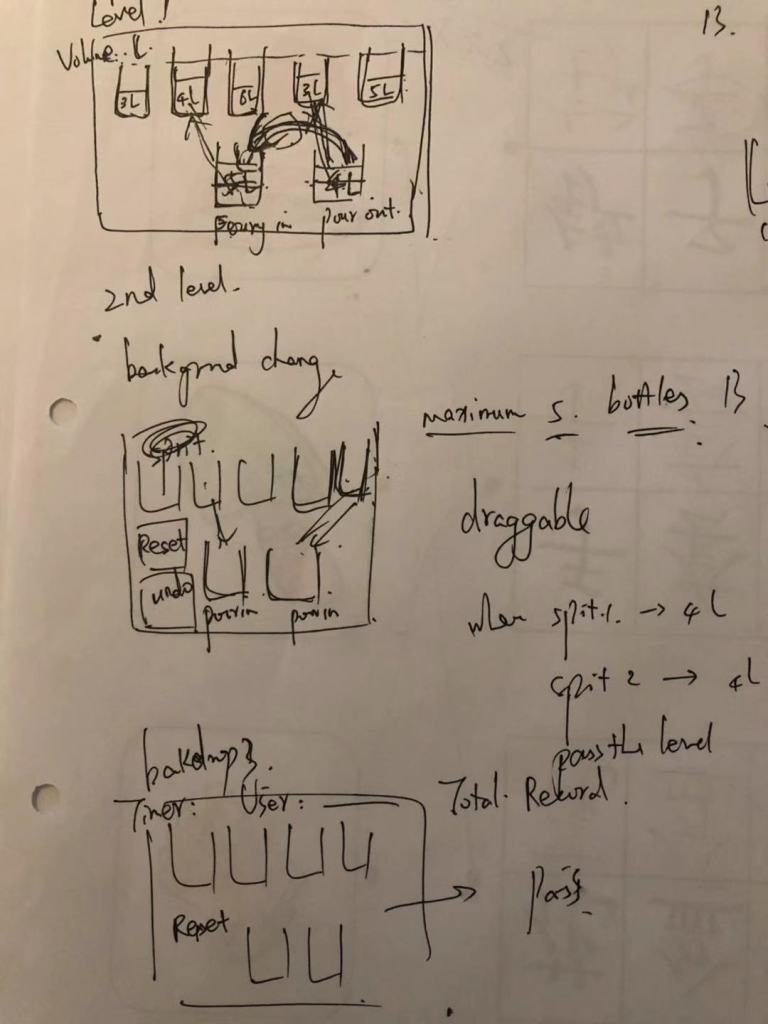
Left: The initial design of game “Separate Water Challenge”
3. Detailed Planning
If you are satisfied with the game interface layout and the “plot” of your game, you could bravely move into the next step, a very important step: detailed planning. You could draw out a table to help you comb up your thought. we will dig into the behavior of each sprite, and the interaction between them. In another word, you need to think about the logic or game line, e.g. what will the sprite A respond if it touches Sprite B? What will happen if Sprite B is clicked?
You could choose various ways to do detailed planning. Either a blank paper or an Excel document on computer can work well. Feel comfortable to record down your thought on the game and check the logic holes in every aspect.
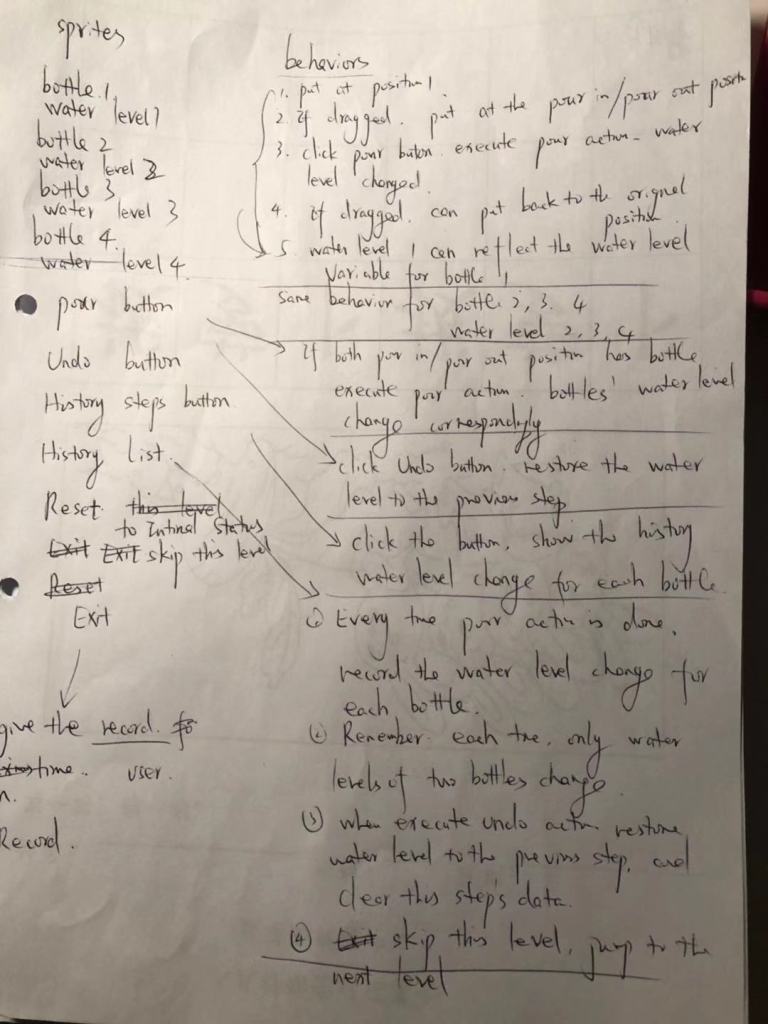
Right: detailed planning of game “Separating Water Challenge”
To speak the fact, the doc is not a perfect example of detailed plan. It is not written formally. Since I designed the game individually, I just kept the casual format. If the game involves the team work, it is a better idea to put it in an Excel file and keep the language clear and concise.
4. Begin Coding
Once you finish checking your detailed plan and find no holes in it, it is time for the most exciting part of the game design. Just lift up your sleeves and delve into coding! Remind yourself of focusing on coding the functionality and reject the attemption to design an exquisite interface at this stage.
Different people might have various habit for coding, but for me, I usually use “psedo” sprites at this stage. , my habit is to only use “pseudo” sprites at this stage, so that I could concentrate on coding.

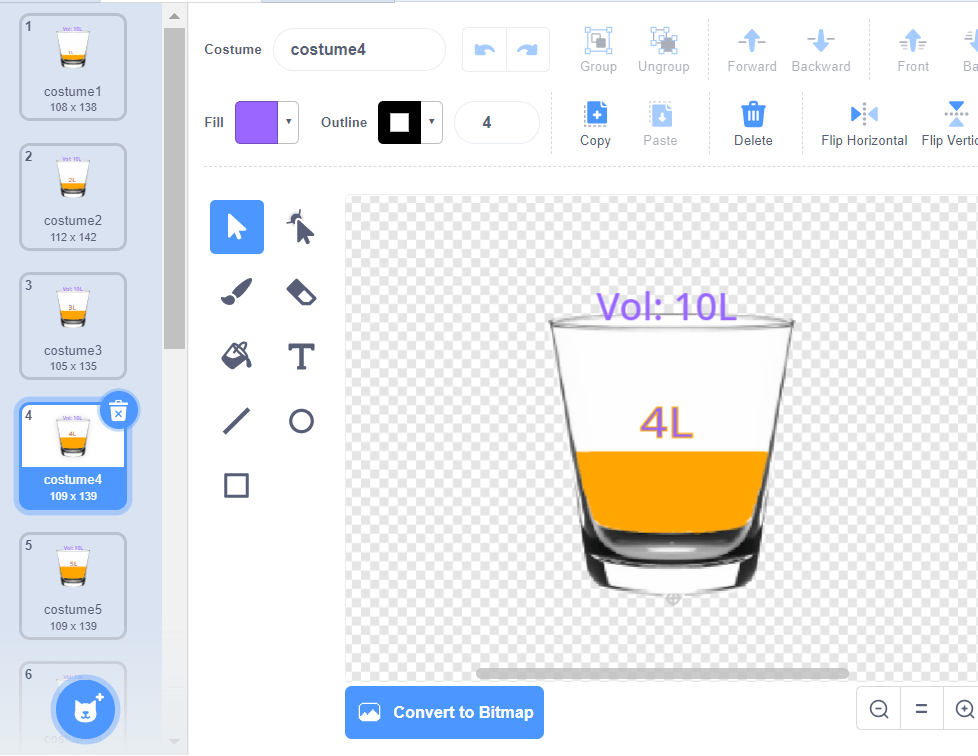
In the process of coding, everyone will get stuck by the initial design, find out more holes which are covered in the detailed plan, or think about better ways to design the game. Never mind, you could change your detailed plan and update your game, but remember one thing: create versions for your game, so when the new design does not work, at least your could revert to your older version.
Before you are desperate to retrieve your older version of code, the version control looks useless.
5. Optimize Interface and Wrap up Your Game
Finally, when the major functionality of the game can work properly, you could heaven a sigh of relief and enter into the last episode, and to some of you, the most artistic and interesting section: interface optimization. That includes a lot of content, including but not limited to:
- Choose your favorite backdrops
- Add costumes for your sprites
- add visual effects for your sprites
- add sound effect for the actions
- add backdrop music
- adjust the minor functionalities
As to how to enhance the artistic effect of the game and how to create exquisite images and backdrop, I will introduce in a separate post.


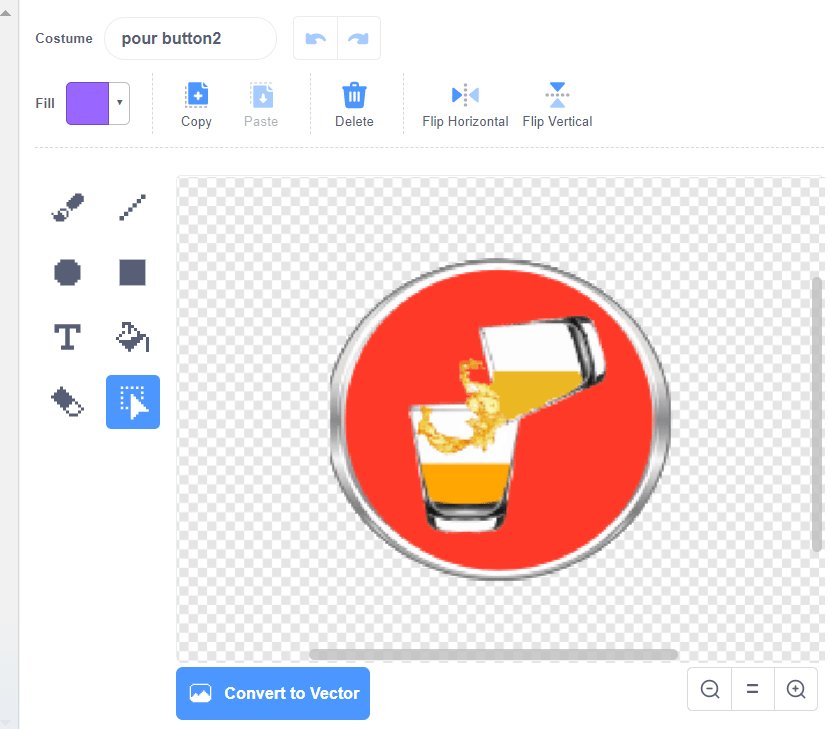
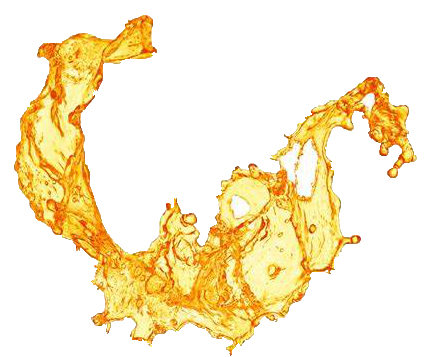
Did you notice that I combine several pictures together to create the round water pouring button?
Now it is the end of game design. Enjoy your coding!
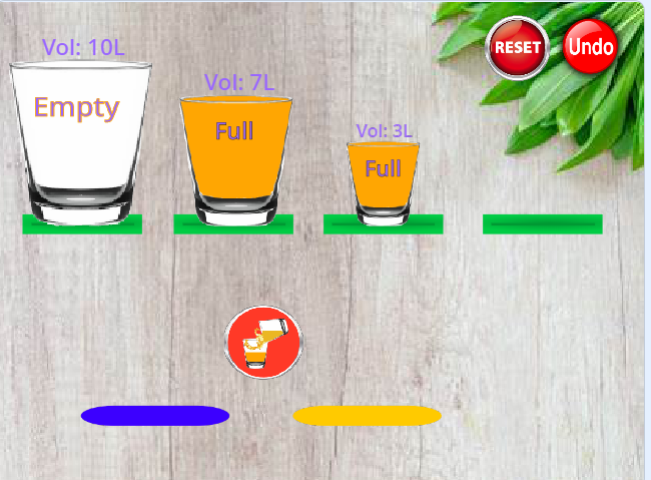
Play the game at this address: https://scratch.mit.edu/projects/327736775/
Note: All the analysis articles are copyright products of http://www.thecodingfun.com. Anyone re-posting them should credit author and original source. Anyone using them for commercial purposes or translating them into other languages should notify TheCodingFun and get confirmation first. All Rights Reserved.

Hallo Very good blog post. I certainly love this website. Keep it up! many thanks
LikeLike