
In the previous post, I recorded the first experience of using LEGO Spike Prime programming tool. It is an App based on Scratch 3.0 block language. Compared to LEGO EV3-G block language, LEGO Spike App not only is easier to get started but also introduces more flexbility in programming. In this post, let me explain our first experience of using LEGO Spike Prime to build a vehicle model and compare it briefly with the LEGO MindStorms EV3.
The Key Difference: Connection is Much Easier
Many people might have expressed the opinion that LEGO Spike Prime is much easier to get started than LEGO MindStorms EV3. For me, what matters the most is that I could spend much less time on connecting different parts of a model.
The main reason is that LEGO Spike Prime has updated the design of motors and sensors, making them much easier to get connected with each other and with other components.
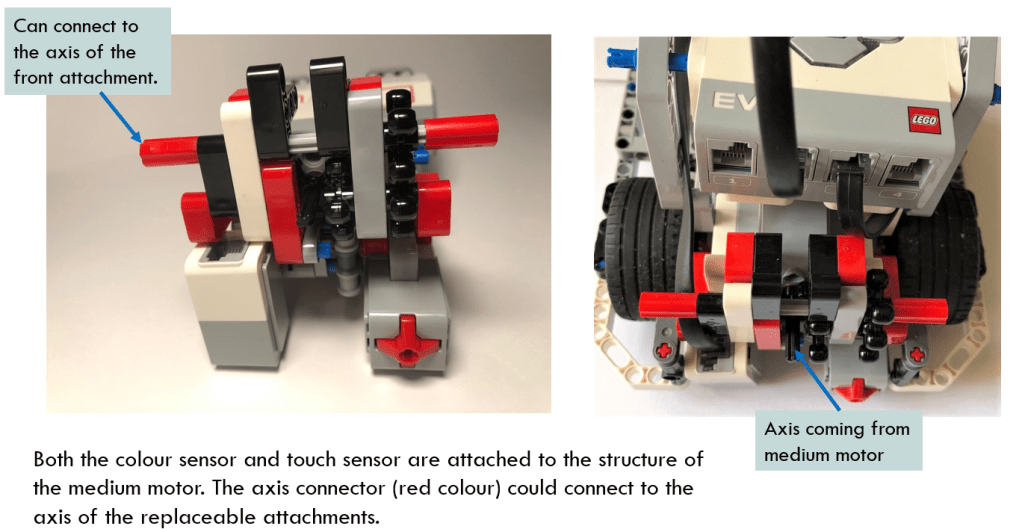
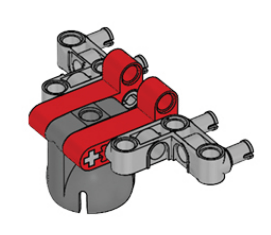
In LEGO MindStorms EV3, the motors and sensors are all designed with a bulging handle, as circled in the below diagram. The handle consists of three holes, including two round holes and one axle hole which could connect with axles or connectors. User needs to use a combination of axles, connectors and beams to fix the motors and sensors to vehicle body.

Take the example of LEGO EV3 model COR3, you would notice that there are lots of connectors and beams coordinating just to attach the touch sensor and color sensor to the body, as shown in the below diagram.
In contract, the shape of the motors, sensors and smart hubs all become like cuboid in LEGO Spike Prime. The connection holes on the motors and sensors are just right in the proper positions, making them much easier to connect to other parts.

Previously, when I create LEGO MindStorms EV3 models, much time is spent on thinking how to connect the front attachment or sensors to the vehicle chassis. It is difficult to find a proper position and direction to connect the components. Sometimes, connectors need to combine with each other to form a more complicated structure. As shown in the below example, the castle wheel needs to uses several connectors to make it possible to attach.
In LEGO Spike Prime, there are some new components, such as 11*15 frame and 7*11 frame, which could be used as the chassis base to connect motors. Castle wheel’s cap is like a I-shape beam. Yellow panel could act as a stable base to hold other components. Together with many other components, they provide convenient way to build a robot model and make it work.

As I mentioned before, LEGO EV3 core set contains different types of connectors which are powerful, but sometimes confusing. Many of them have been excluded from LEGO Spike Prime core set, but you could still find them in LEGO Spike Prime Expansion set.

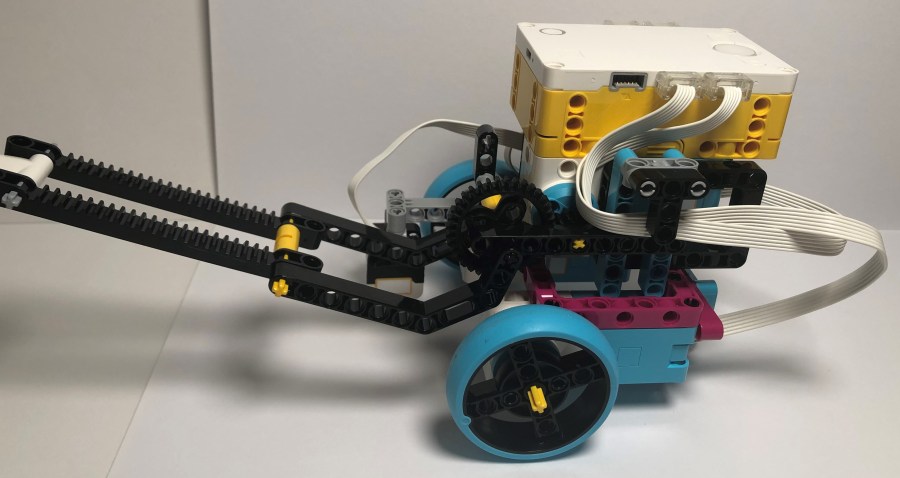
An Example: Build a LEGO Spike Model
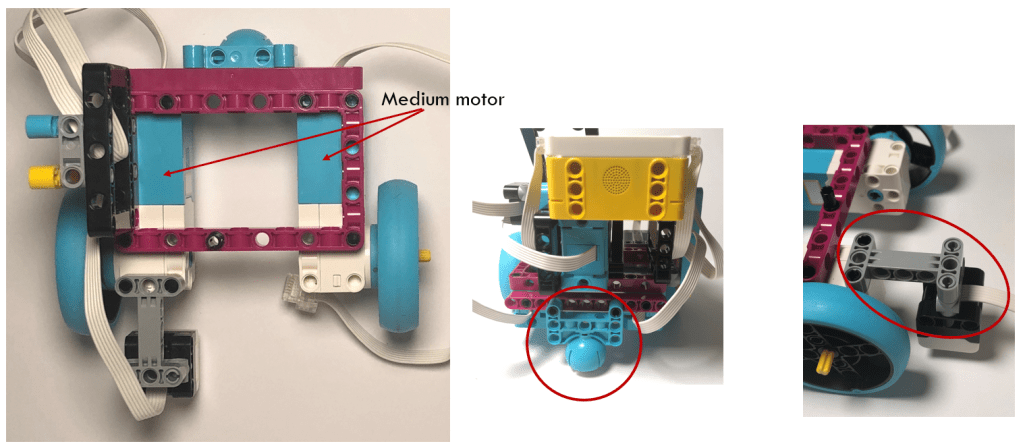
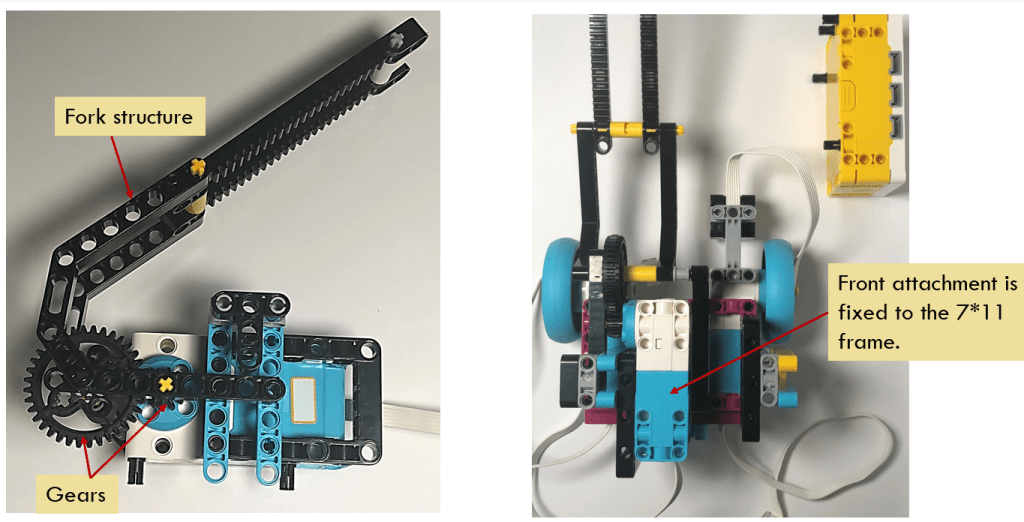
Based on the above introduction, I would like to demonstate the process of building a model with LEGO Spike Prime. From the below diagram, you could see that the two medium motors are attached to a 7*11 frame just with several black peg connectors. The castle wheel is attached to the same frame with the same type of connectors, too. For the color sensor, it is attached to one of the medium motor by using a I-frame beam. It is definitely not necessary to combine the axles, beams and several connectors together just for the purpose of connection.
The front attachment is driven by a big motor with a gear mechanism. Through a 5*7 frame and several beams, the gears are attached to the big motor stably. The front attachment then is fixed onto the above mentioned 7*11 frame with several peg connectors. Finally, the technic hub is put on the top of the vehicle with several black peg connectors. Done!
Make the Model Run
Equipped with color sensor, and position sensor (which is an embedded sensor of the technic hub), this demo model could execute its task now. As shown below in the video clip, the front attachment could be lifted up. The model starts off from the base, finds the red line, follows the line, crosses a gap and moves forward. All of those typical tasks of LEGO EV3 models could be implemented on LEGO Spike Prime, amazing, right?
In the following posts, I will introduce using LEGO Spike Prime App to drive the model to “identify” the signs on the map and accomplish its mission. Stay tuned and welcome to the world of LEGO Spike Prime!
Note: All the analysis articles are copyright products of http://www.thecodingfun.com. Anyone re-posting them should credit author and original source. Anyone using them for commercial purposes or translating them into other languages should notify TheCodingFun and get confirmation first. All Rights Reserved.
