
In my previous post, I analyzed one interesting game called BeatCube! It is a bit complicated Scratch project, at least in terms of the total code lines. I also mentioned that it is not easy to understand. Anyway, there are good points and also some place not written so well. Through reading and analyzing others’ project, we could absorb their good ideas and learn how to design better projects by ourselves.
Recently, I just got time to remix this project. I upgraded its code structure, removed some unnecessary variables and conditional judgement, and made it easier to read. In this series of posts, I will explain what areas I upgraded and why I did them.
The original project could be found at: https://scratch.mit.edu/projects/343969737
The remixed version is: https://scratch.mit.edu/projects/409476190/
The original Scratch project analysis could be found here.
As usual, I will begin with the easy sprites and then move to explain the more complicated sprites – Land and Player in the next posts.
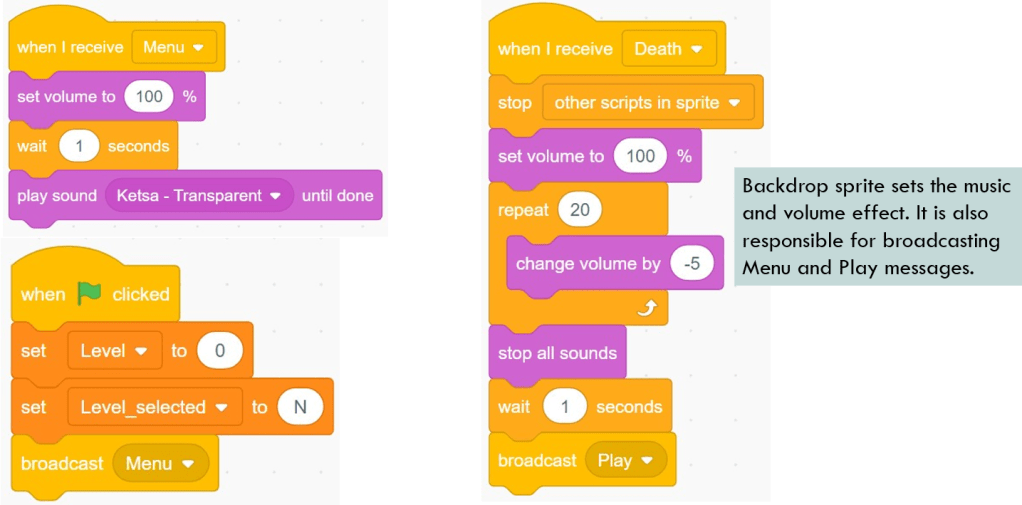
Backdrop Sprite
There is not big change for this sprite, but minor changes and cleanup.
In the original project, many code segments call “stop other scripts in sprite” block. Although it is not harmful, it is not necessary, either. “stop other scripts in sprite” block could be used when a code segment contains “forever” block which could not be stopped easily. Since there is no any “forever” block in this sprite’s code segments, it does not need to use “stop other scripts in sprite” block.
The two variables “Song” and “IsPlaying?” are changed to “Level” and “Level_selected” respectively. No other reason, it is just because the renamed variables better explain their purpose.
“Level” variable specifies the current playing level. If its value is equal to 0, the program is in menu selection page. “Level_selected” variable is of Boolean type. If it is Y, the program has chosen the level. The “Level” variable will be set to 1 (green color level), 2 (yellow color level) and 3 (purple color level). If “Level_selected” is N, the program is still staying at menu selection stage and has not chosen the level.
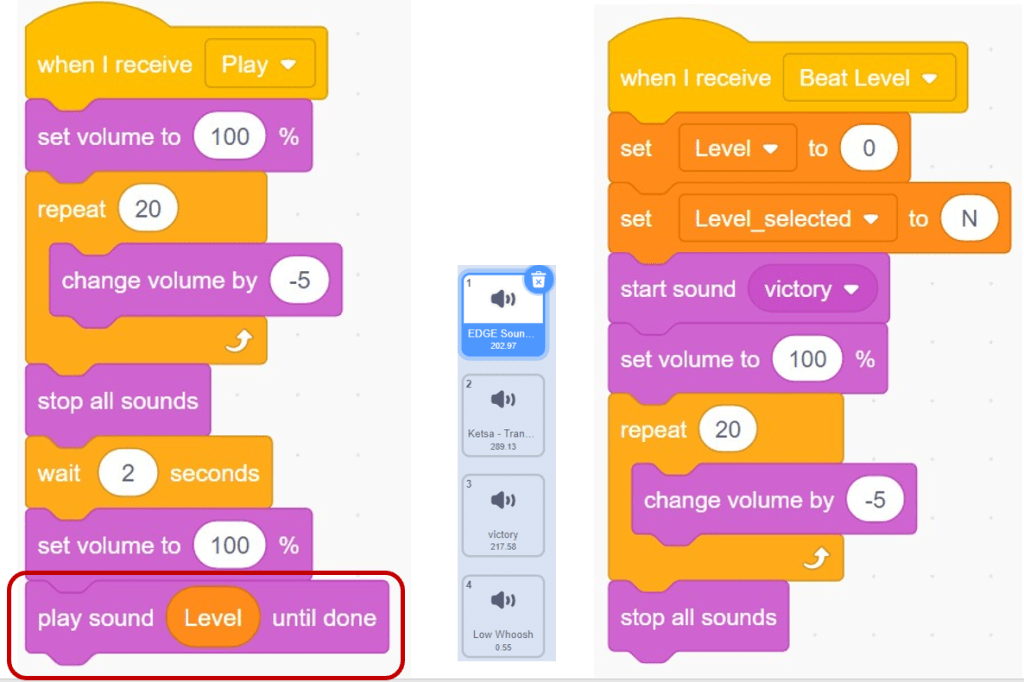
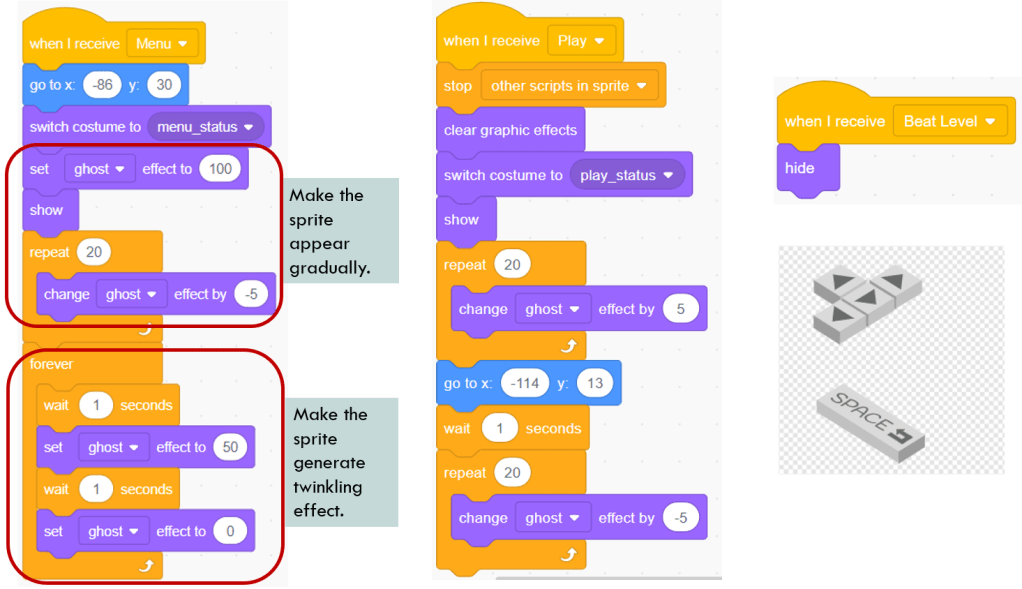
Key Sprite
In the remixed version, I simplified this sprite. It does not use clone method any more. There are three code segments specifying its behavior in “Menu” stage (choose the level), “Play” stage (play the game) and “Beat Level” stage (pass one level) respectively.
Transient Cover Sprite
This is a new added sprite, which is just a black cover. The logic for this sprite is simple. When player passes one level, this sprite will show up gradually and then fade off. After this, it will broadcast Menu message to let the player choose another level.
Level Text Sprite
This is also a new added sprite. The code is similar to that of Transient Cover sprite. It also appears simultaneously with the latter.
Thumbnail Sprite
I did not change the code for this sprite except the costume name. When the player stops playing, the program will show a new costume “game screen capture” which is different from the original project.
That is all the changes I made for those auxiliary sprites. In the next post, I will analyze the most important and complicated sprite: Land. Compared to the original version, I have changed the code structure to make it much more concise without influencing the functionality. So keep tuned!
Note: All the analysis articles are copyright products of http://www.thecodingfun.com. Anyone re-posting them should credit author and original source. Anyone using them for commercial purposes or translating them into other languages should notify TheCodingFun and get confirmation first. All Rights Reserved.

I’m so happy to read this. This is the kind of manual that needs to be given and not the accidental misinformation that is at the other blogs. Appreciate your sharing this best doc.
LikeLike
I value the post.Much thanks again. Awesome.
LikeLike
Pingback: Learn Scratch by Remixing Others’ Project – BeatCube! remix Part 2 – Coding Courses Designed for Kids